|
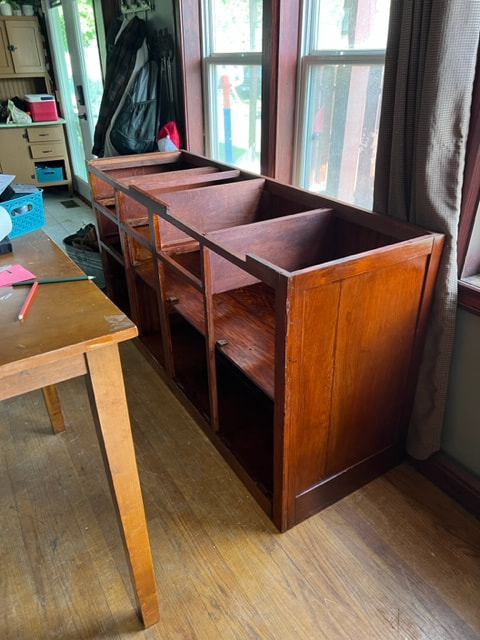
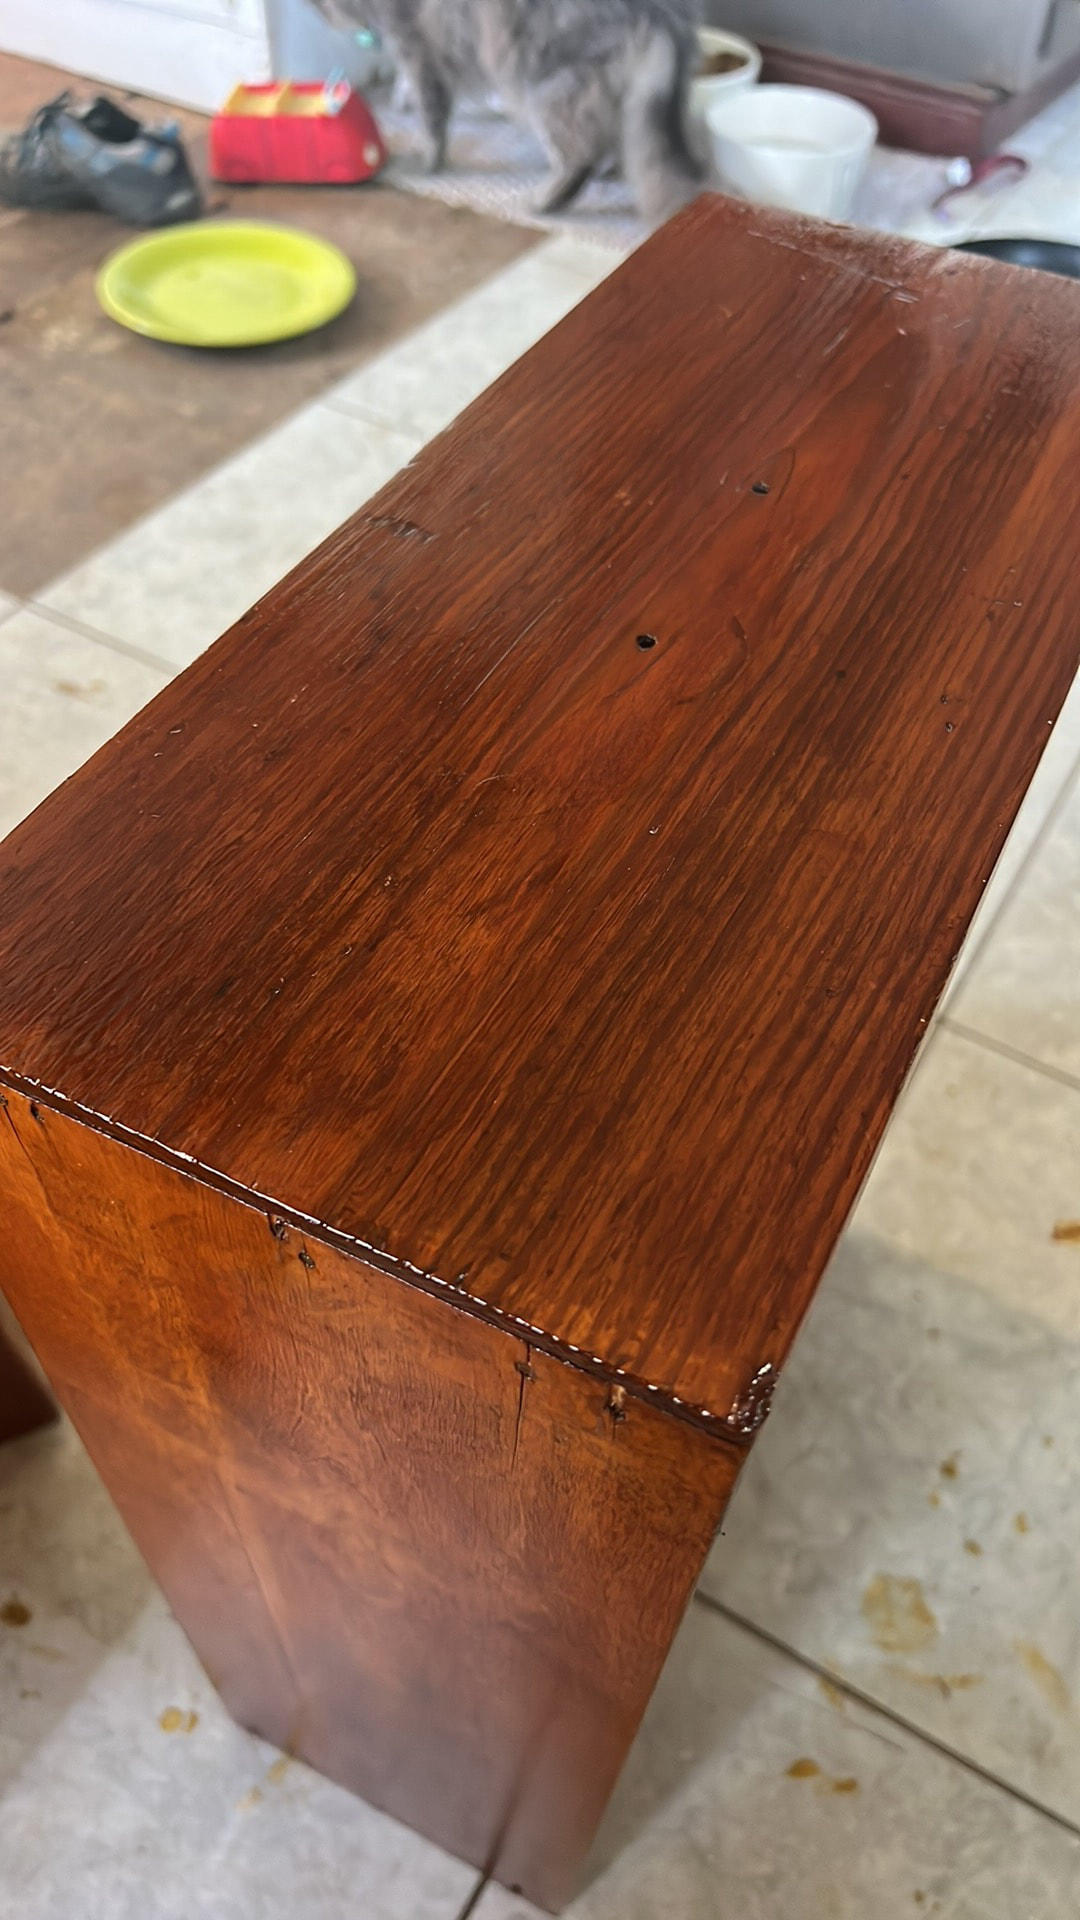
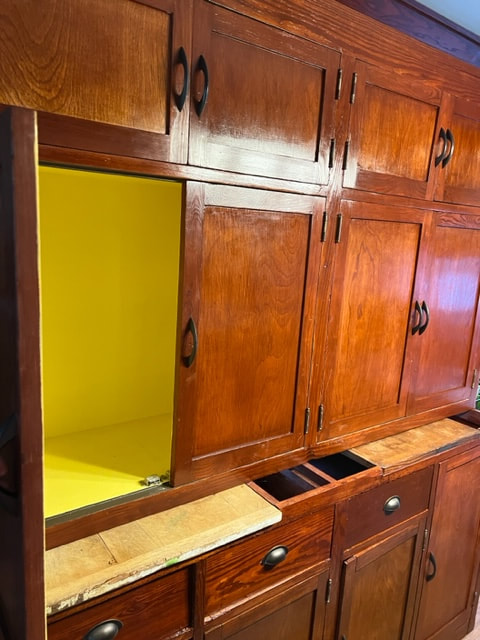
June 2022 - Growing up, dad always said our house's decorating style was "walk in-back out." This, referring to the amount of antiques they had collected over the years, and each time a new haul was brought home, there was just a bit less space than before. Dad always obliged to mom's musical furniture game, and hardly ever questioned her on the dwindling use of space. Now, in my own home, I am certainly feeling dad's walk in - back out lifestyle. The walls are closing in! While waiting for our house addition loan to be finalized, I've been trying my hardest to make use of our current space and playing musical furniture as well. However, when I find something on Marketplace I can't pass up, I just can't help myself. Well....here she is:  Recently listed was this old built-in cupboard located about 45 minutes from me, with a "make offer" as the price. "Tyler, check this out!" "That's cool. You don't have a place for it." "It could go in our future butler's pantry." "You have no place to store it right now. How much?" Tyler's always reminding me just how small our house is, and how HIS garage is already full and busting at the seams. He also reminds me of how I have things stored at my mom and dad's...and at my brother's house. He can be such a fun hater sometimes. Ha. I replied to the listing on Messenger asking if it was still available. It was! I told the man I was unsure of what to offer, because this piece looked like it needed a TON of work, and with Tyler not totally on board, and being 45 minutes away.... To my surprise, he replied back that I could have the piece for free if we came and got it soon. They were cleaning out a house that was to be listed on the market and it needed to be gone. Deal! I told Tyler to get a trailer lined up to borrow, and we would pick it up tomorrow. "Where are you going to put this?" I casually chose to ignore that question until I at least was able to see what I was dealing with.  Once the cupboard was home, my first step was to remove all hardware and get it down to bare bones. I was SO thankful that this piece didn't have much paint, as stripping down to bare wood is such meticulous work. I removed the 60's kitschy adhesive contact paper, swept out the mouse nests, and began scrubbing the inside with denatured alcohol and fine steel wool. I was amazed at how quickly the inside cleaned up, although the cupboard, now a garage cabinet, had a distinct oil smell and stain on the bottom where a can once leaked. 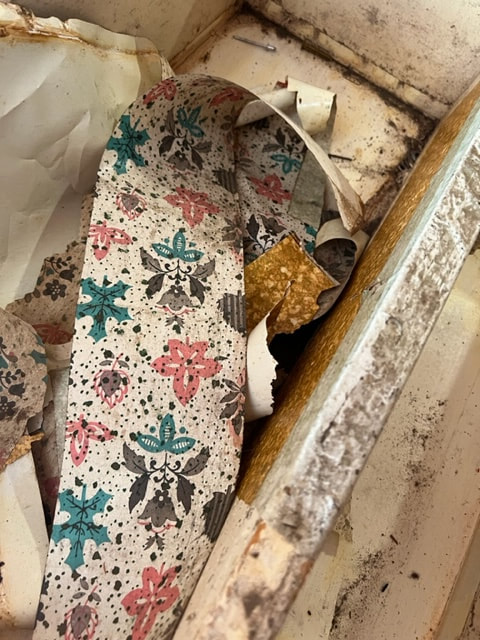 The kitschy retro contact paper - fun right? 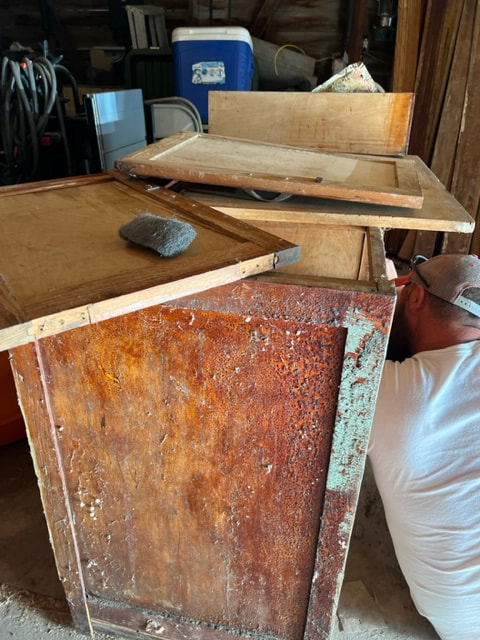 The side of the piece - alligatored shellac and sea green paint that had to be removed. I continued to use a razor blade scraper, steel wool, and denatured alcohol to clean up the piece and prepare for staining. Two of the drawers had painted insides, so I was lucky enough to get to strip the paint from those and sand. Fortunately the paint was fairly easy and receptive to the chemical paint stripper. For the stain, I went with the same color I used for the trim of the house. A blended concoction of 3 different Minwax stains. The bare, thirsty pine wood drank up the stain and gave the piece such a rich coloring. Three coats of amber shellac, and the outside was ready to go.
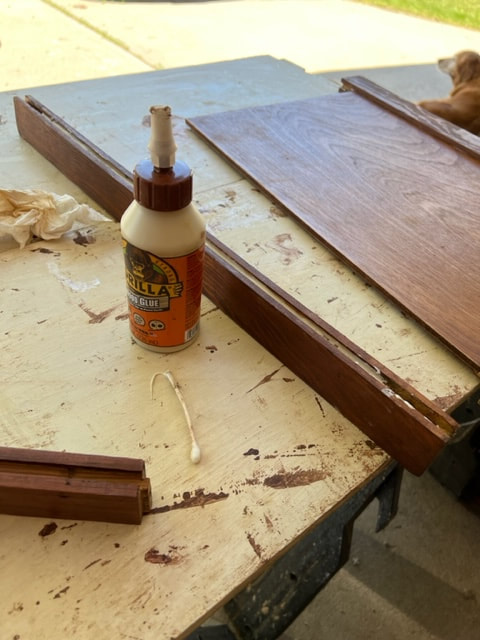
One of the most challenging aspects of this piece was the doors, specifically the larger bottom right door. All of the doors were loose and needed to be taken apart and glued back into place. That was a time consuming process in itself. However, the larger door had a broken frame, and needed to be rebuilt. With VERY limited woodworking skills, I reached out to a couple experts to find my best solution. A guy Tyler works with ended up using a router to recreate a piece of the frame that connected to the rest of the frame. With some wood glue, the end result was flawless!
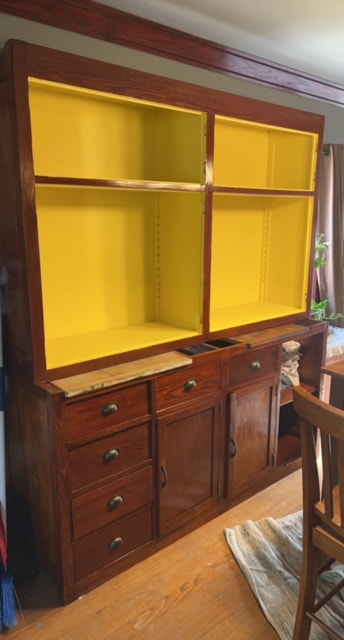
With the bottom done, it was time to tackle the top portion. The inside of the top was painted a cream color, and was originally painted. Rather than go to all the work of removing paint for something that was originally painted, I opted to repaint. When I went to the store, I was looking for a "cheery yellow." The very first color I grabbed was called "Sweet Corn," and I instantly knew I had found my color.
July Fitting the cabinet doors and drawers turned out to be quite the puzzle. Only certain doors and drawers would fit in certain places, and I'd be left with one door/drawer that wouldn't fit the last remaining spot. I ended up going back to the very initial listing photo - the only photo I had when it was assembled, and zoomed in close to look at the unique grains of the wood to figure out which should go where. I finally sanded down the shelves and stained them to match the outside, and she was complete. There she sat for a year. A long year, eagerly awaiting to be installed in her future butler's pantry. Throughout that time, we moved the piece twice in order to accommodate our small space. (It was SO great for storage during that time, even though it was a behemoth taking over our small living area. Fast forward to now, July 2023. (I had originally began writing this a year ago when the project was fresh in my mind and just finished.). I am so thankful I waited and lost track of time, as I can show you the full effect of this piece - in all her glory. She took approx. 50 hours of work total; cleaning, scrubbing, sanding, staining, painting, assembling. So. Much. Work....but SO worth it. 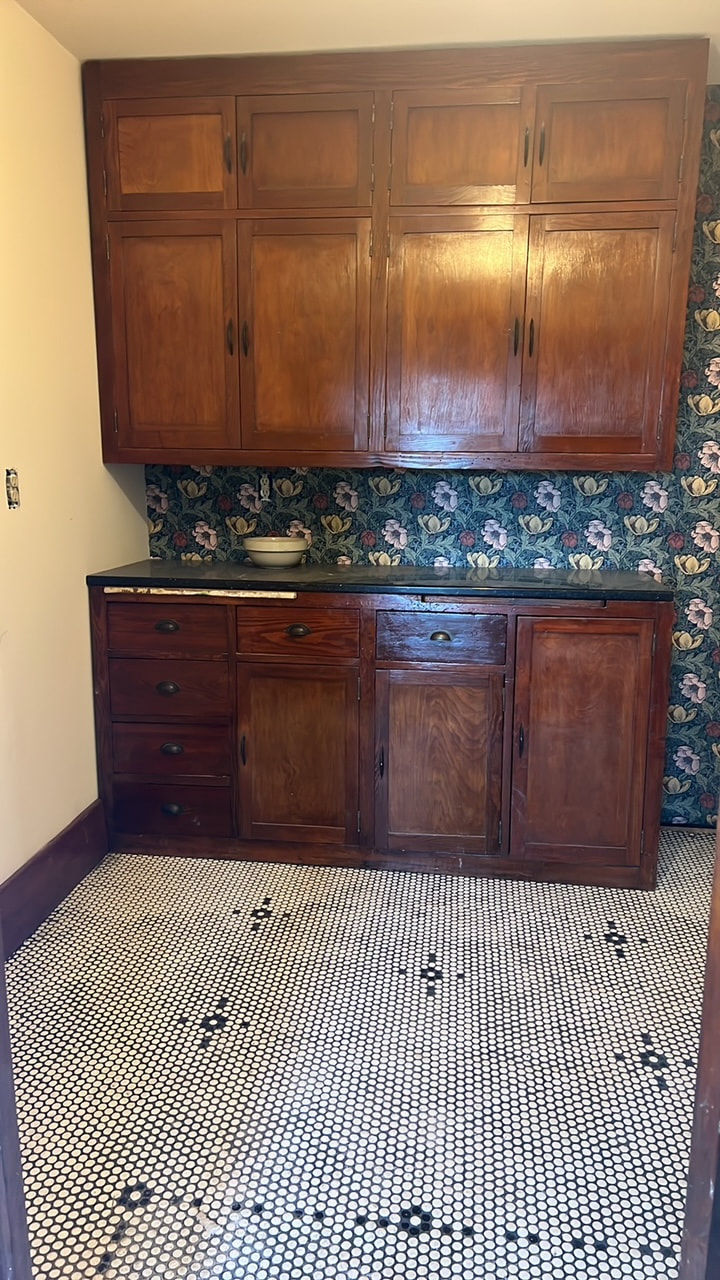 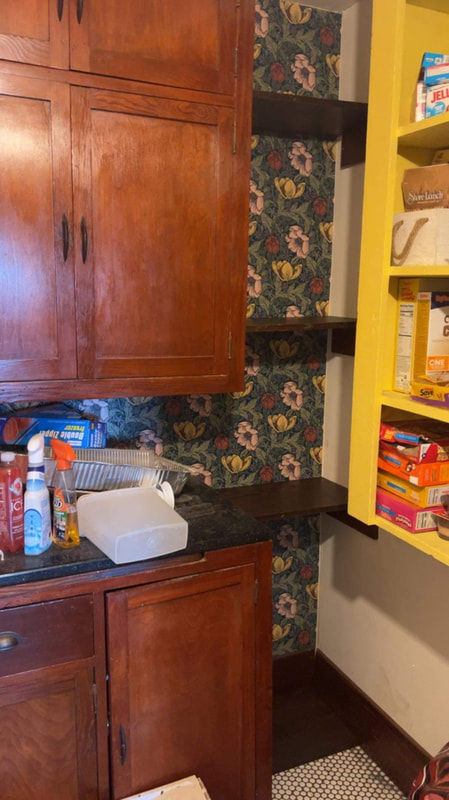 We ended up having to slightly alter the piece, as it was too tall for our 8ft ceilings. We cut out the center portion, and hung the top from the ceiling. We added a matching dark quartz slab that we also used in our kitchen. The penny tile floor is probably another blog post in itself - anywhere you see a black tile? We cut out a white tile and hand-set the black tiles. Definitely a labor of love. The floral vintage-inspired wallpaper I found online, and pulled the yellow of the interior of the cabinet (and other cabinet you can see just a little bit of) to tie it all together.
Nearing the end of our addition, we are finally done living our walk-in, back out lifestyle. Wow. So much hard work and such a long process, but being on the other side, it is sure sweet to have now. By the way - this butler's pantry? It used to be our ENTIRE kitchen.
0 Comments
Leave a Reply. |
Kathryn HollandWife. Mother. Teacher. Lifelong student. Archives
March 2022
Categories |

 RSS Feed
