|
It all started with a dream - a claw foot tub. How can you have an old house without one? Since we made the decision to add on to our house and take it back to the 20s time period, I had been looking for a claw foot tub at a decent price. I figured we could swap out our cheap steel builder-grade tub and put in the claw foot. While we were at it, we might as well finish the floor, too. Ok, so this wasn't the first time we remodeled this bathroom. A month after we got married, we moved some walls around, expanded our bathroom, and moved the laundry upstairs. That was 7 years ago, and I had lived with the cheap stick-on vinyl tile long enough. We knew it wasn't going to be the final solution - it was more of a band-aid fix. I don't have any true "before" photos from when we moved in. You could touch all of the walls of the bathroom - AT THE SAME TIME. Teeny. Tiny. It wasn't going to cut it. When they added the 10ft. addition in the 70s, there was an awkward room next door, so we expanded the bathroom into it. 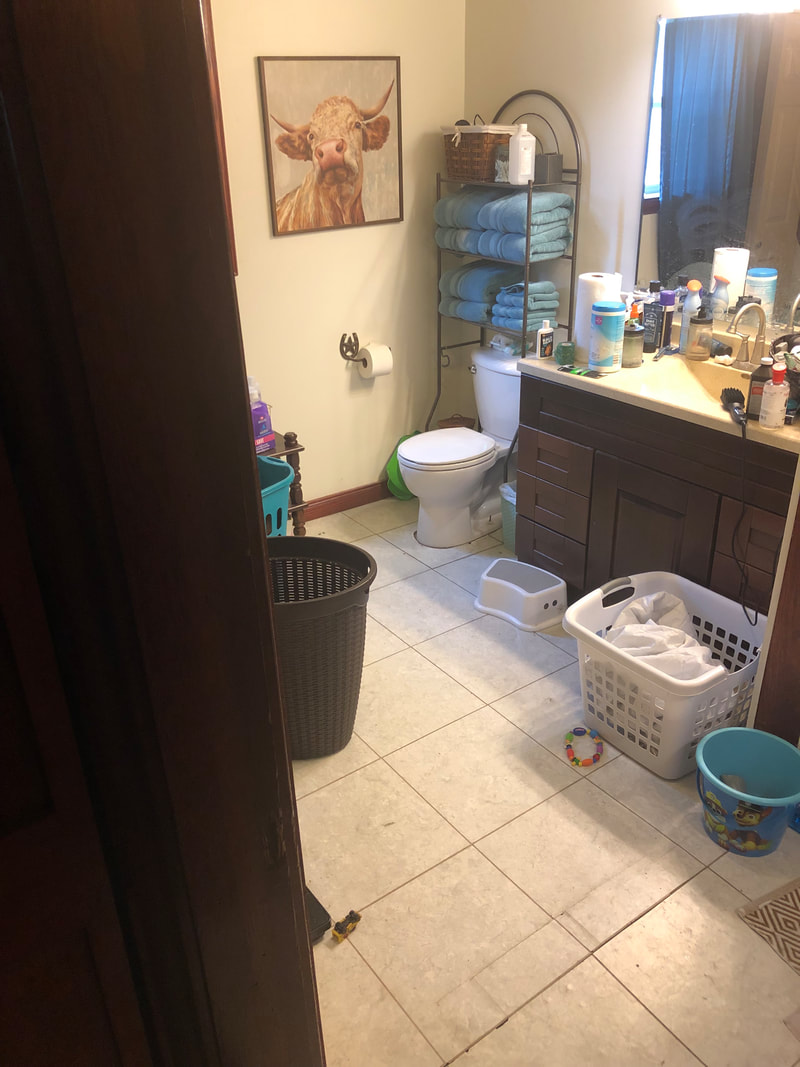 Before: The curse of the vinyl floor tiles. After living with our band-aid fix long enough, I made the executive decision to start working on a claw foot tub. Our tub came from Hastings, and was removed from it's original location by an older couple looking to put in a walk-in tub. It's a bit modern for our 1920 house - it was stamped 1922 on the bottom. For being nearly 100 years old, it is in amazing condition. We took the power washer to it, and a rainbow of colors had appeared. It astounded me as to how many times this thing had been painted! Tyler finished by smoothing out the flaked paint with a metal sanding disc.  The bathtub inspired by rainbows. I visited my local hardware store, and picked up my paint. I'm a fan of Valspar paint, but I find that they don't offer many colors. A trick I learned is to find your color at another store, and have them color match. It turns out perfect every time. A quart of Valspar Pristine brought the old tub back to life. Meanwhile, the old builder-grade tub needed to come out, as did the vinyl tile. Underneath the tile was the original oak flooring in the original part of the house, and simple plywood subfloor on the new part. We were so nervous of the same problem happening in the bathroom as we encountered in our bedroom - that the original oak floor and the subfloor would be the same height, with no room to lay the oak flooring in the new part. Thank goodness that wasn't an issue here, and there were two layers of sub floor. 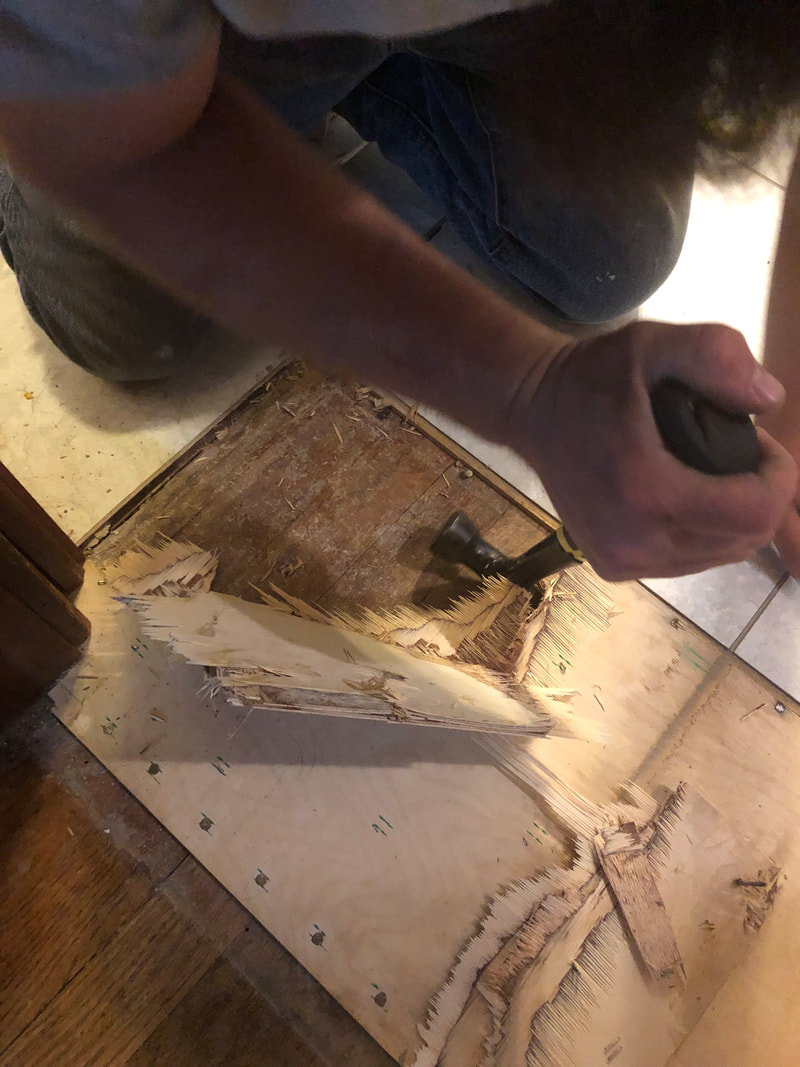 Pulling up the vinyl tile and subfloor. Look at all of those nails! 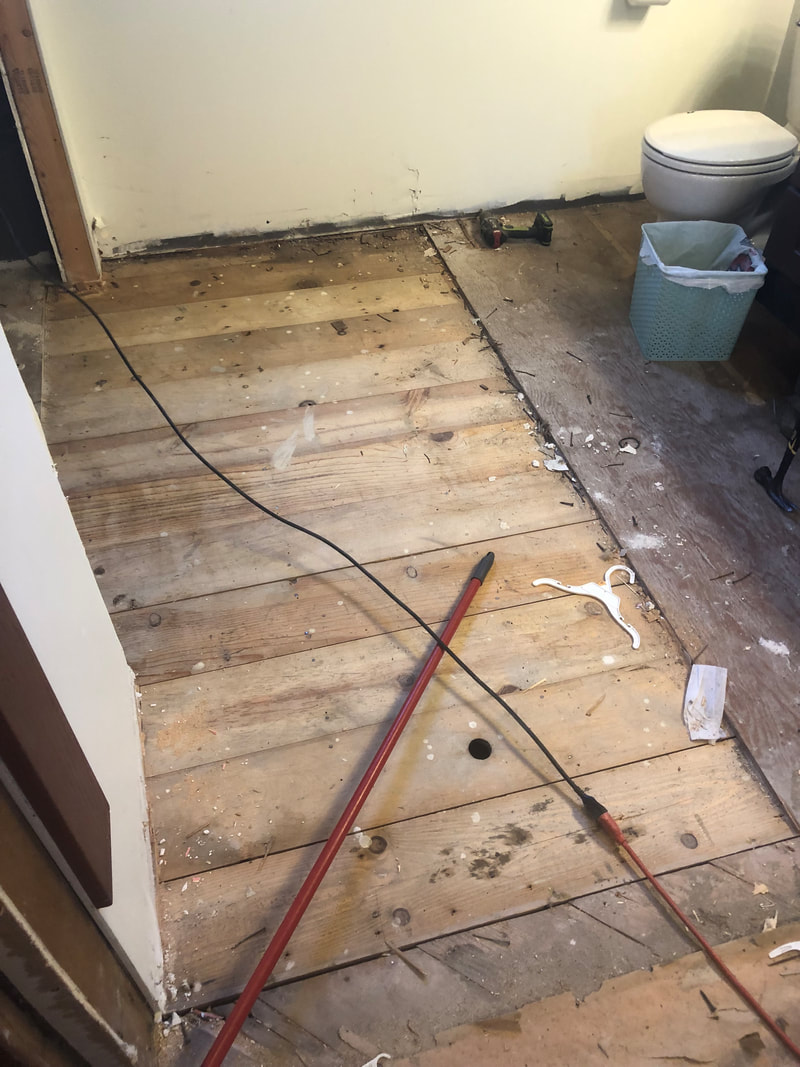 Sub floor underneath the sub floor! No extra work needed to lay the oak flooring. 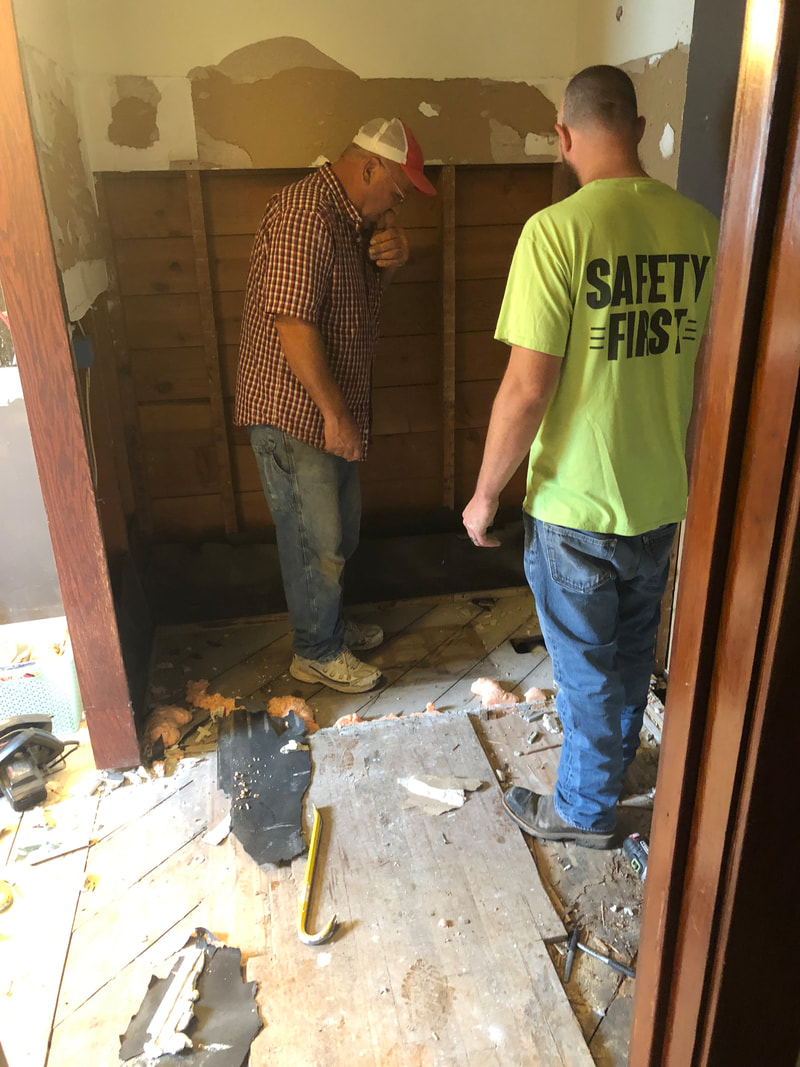 "Mom, now THAT is some destruction!" - Easton  Some plumbing work was required, which meant cutting a hole for access to the crawl space. A tight fit! After getting all of the prep work, we installed our oak flooring. We bought it second hand from a house near Sargent that was removing it to put in laminate flooring. I'm not so sure they knew that you could refinish it! Tyler put the boards through a planer to remove the finish. We thought this was the best option at the time, but we've learned that just simply sanding will be a better option for the future. After the floor was installed, it was time to finish the drywall. The glued-on tub surround had completely ruined the drywall, and we replaced a lot of the other drywall with a mold-resistant type instead. I had also wanted to move the location of the ceiling light, as that was something that had driven me nuts since the first time we remodeled. There was a pretty significant amount of finishing to do. Since we're always on a budget and enjoy doing things ourselves, I was put in charge of the drywall finishing. This is something I've NEVER done before, and definitely didn't feel confident doing. The best thing to do is jump right in, right?! It turns out that it came pretty natural to me. I enjoy meticulous, time-consuming tasks, so it was right up my alley. Since this is our only bathroom, we had to get creative when we were without a shower. Of course, remodeling always takes longer than you anticipate. Fortunately for us, we have a camper, and relied on that as our second bathroom throughout the remodel. We used our camper for showers for nearly a month! 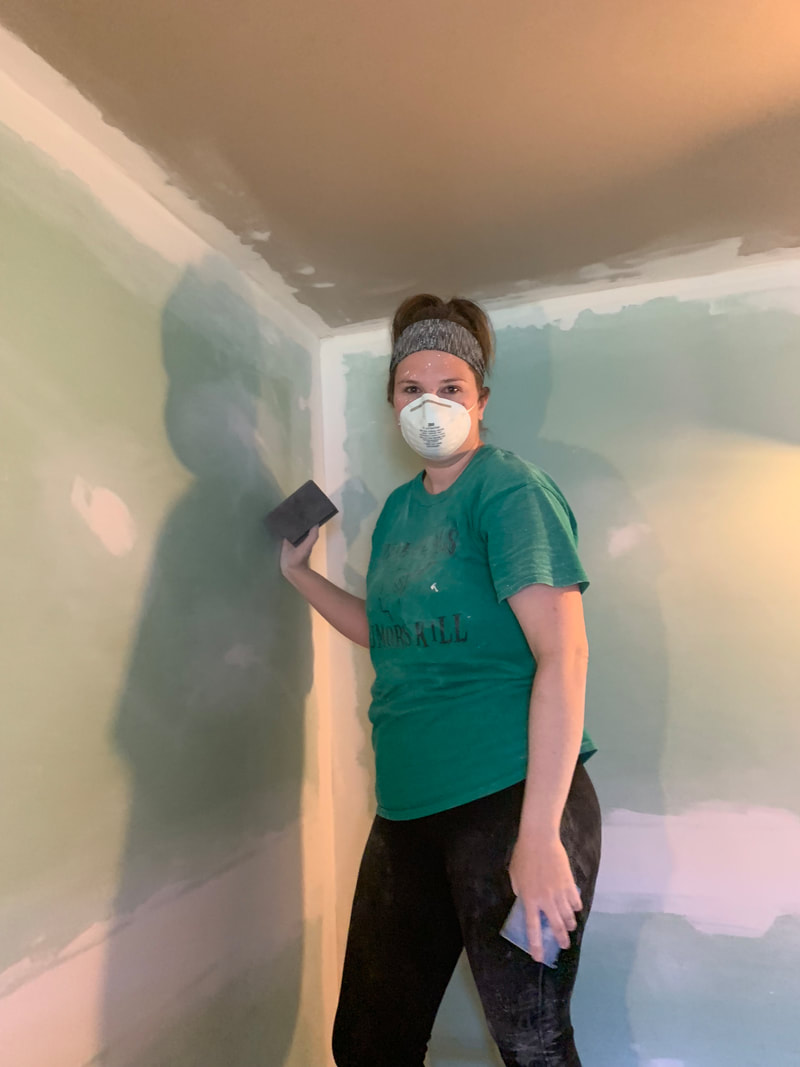 A dusty mess. Next, it was time to finish the floor. We rented an orbital floor sander from Menards. I was surprised that it didn't cost much to rent; the primary cost was the sandpaper, and it took a lot since oak is such a hard species of wood. This is where we realized our planing mistake - the finish came off easily; leveling all of the planing marks was not. After a good solid 2.5 hours of sanding, it was good enough for us. 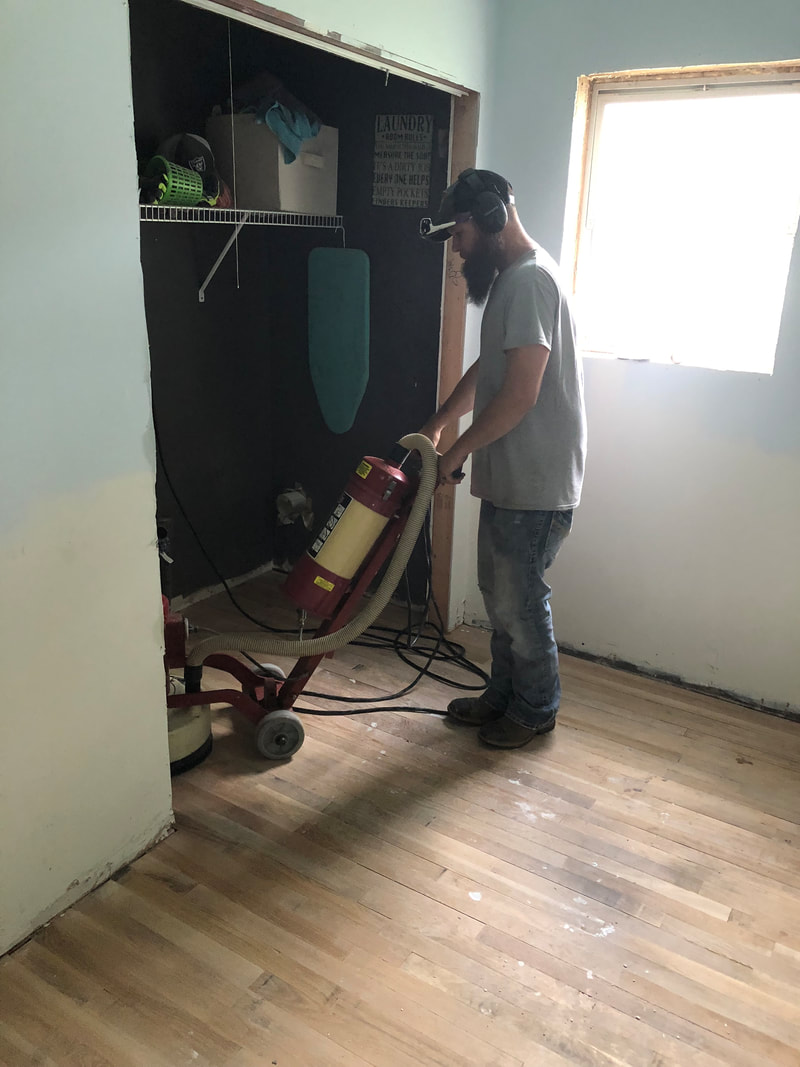 Tyler taking the first turn at the sander. 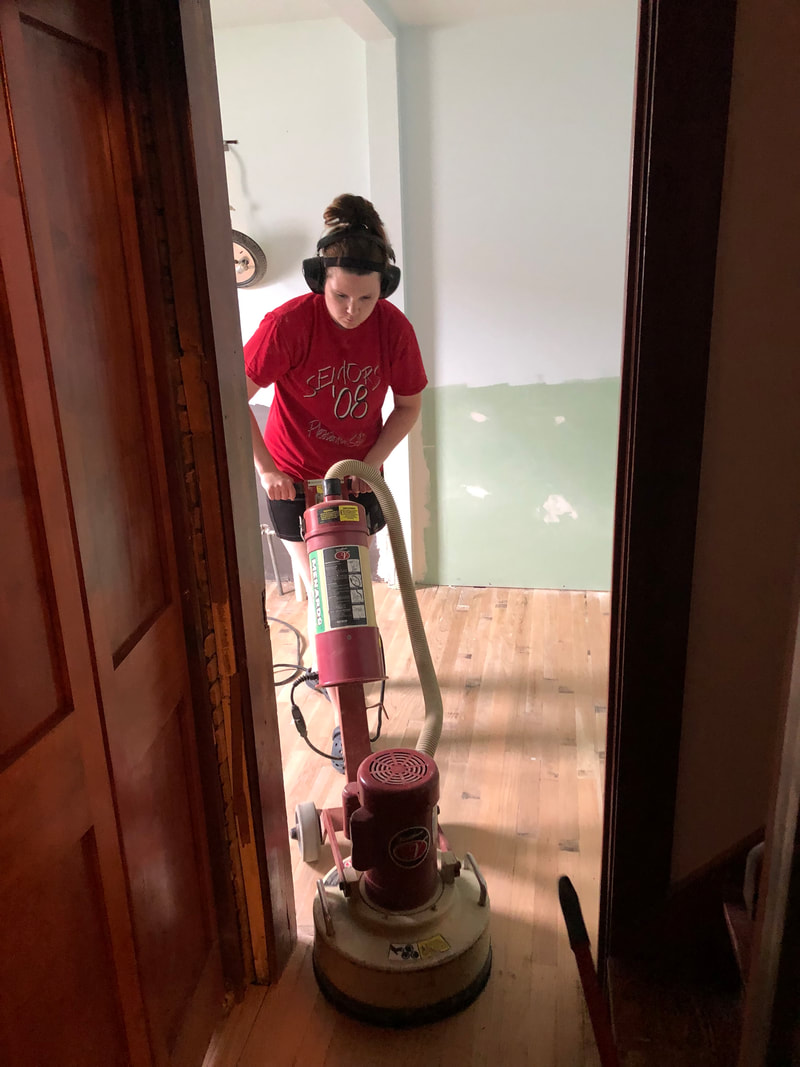 My turn! I had pictured it throwing me around - it actually wasn't too difficult to keep control of. 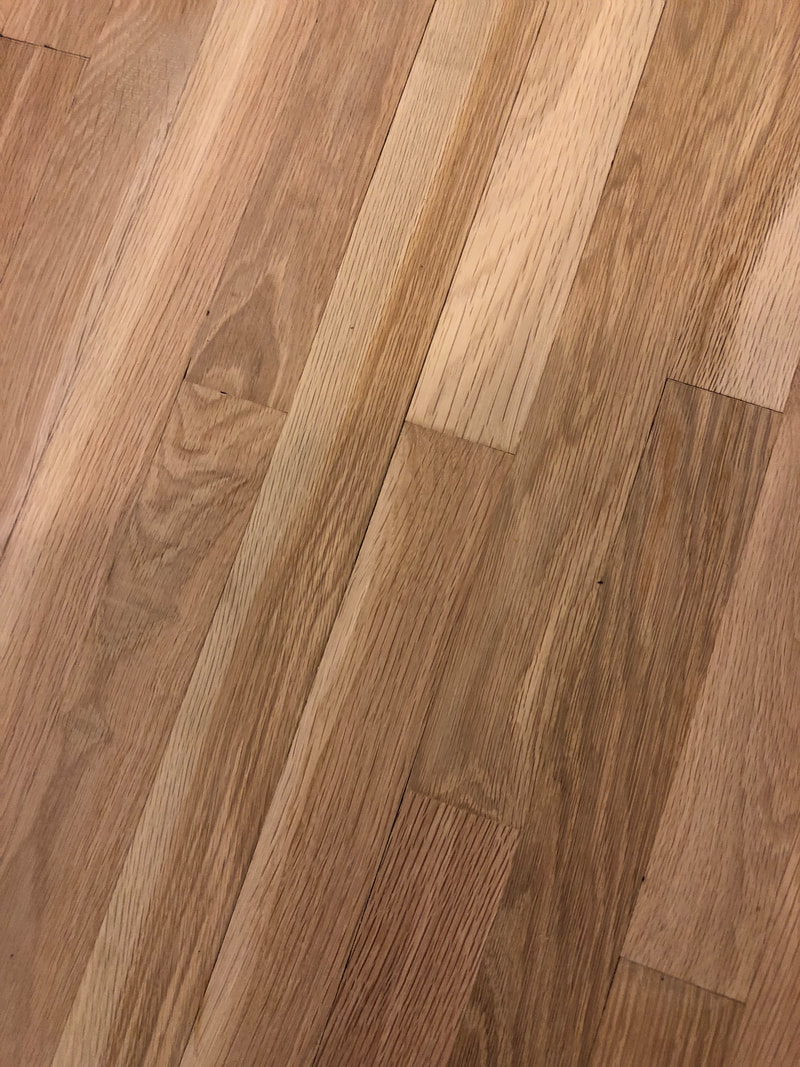 The unfinished, natural red oak flooring ready for stain. Pressure. So much pressure. I had a hard time choosing the flooring color. I wanted something dark, but not too dark, and I needed something that would go with our red-colored original trim. After MANY trials on scrap pieces, I finally came up with a recipe of mixing two colors half and half. We used equal parts Minwax Mahogany and Red Oak. With two coats of poly and a weekend camping trip for it to cure, the floor was beautiful and complete.  Summertime, my boys, and the lake. Pure happiness. Now, for some reason, when your project gets close to the finish line, why is it so hard to finish it?! Going to the lake was just the break we needed - it doesn't take long to get burned out on a home project. However, that break encouraged another one, and another one, and pretty soon, you're completely comfortable taking a shower next to a Sawzall and stepping over the air compressor hose every time you need to use the bathroom. We began the project in July. Then here came the busy beginning of school in August, beautiful camping weather in September, and completely exhausted and stressed out in October. This weekend, I told Tyler we HAVE to finish this for my sanity. We had it basically all put together: we just needed to finish a small amount of trim work and fix the shower curtain bar so it would stick out further. (The shower curtain clung to you when you showered - nobody likes that.) After working Friday evening and most of Saturday, we are DONE! FINISHED! COMPLETE! And it feels so good - the first room completed on the main floor. My design inspiration was classic - what would've gone well when it was first built. I chose a bright green beadboard trim, because neutrals and white get so boring, and I wanted a lively color. The color was very similar to some beadboard my father had salvaged out of his turn-of-the-century one-room schoolhouse. I used a washed-out blue color for the top of the walls and ceiling to keep it light. For the bathtub, I wanted a dark color to contrast the white enamel on the inside. We had to use salvaged yellow pine trim, as the only original elements were one piece of trim on the side of the door, and the door itself. We kept the same vanity and countertop as our previous remodel, and it fit in perfectly. After months in the making, here it is! After Photos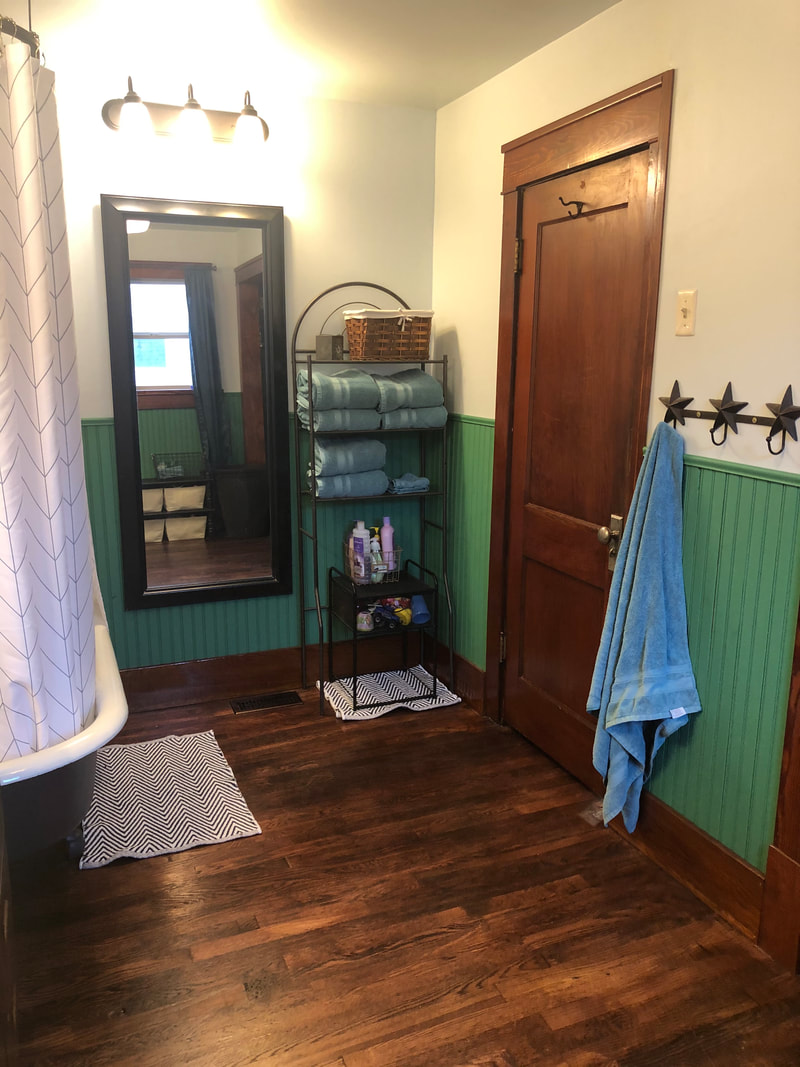 The trim around the door was very difficult to figure out. Nothing is square in an old house. 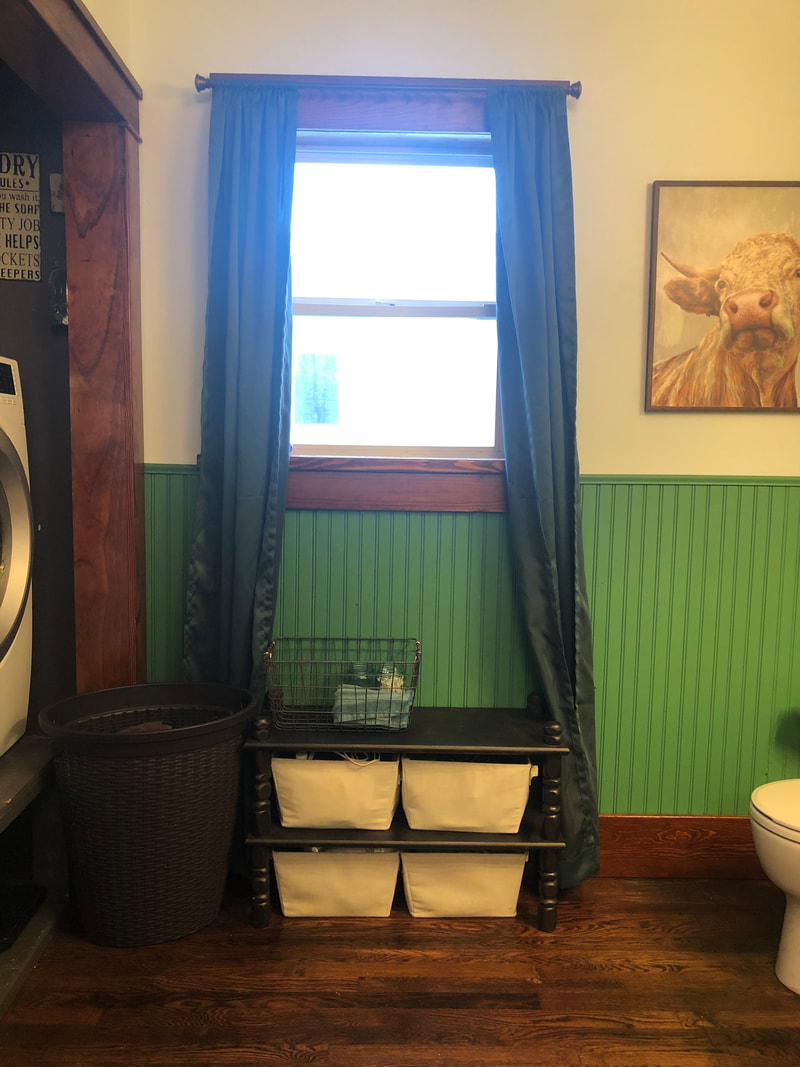 Tyler's handiwork with the window trim, and my Hereford prominently claiming his place on the wall. 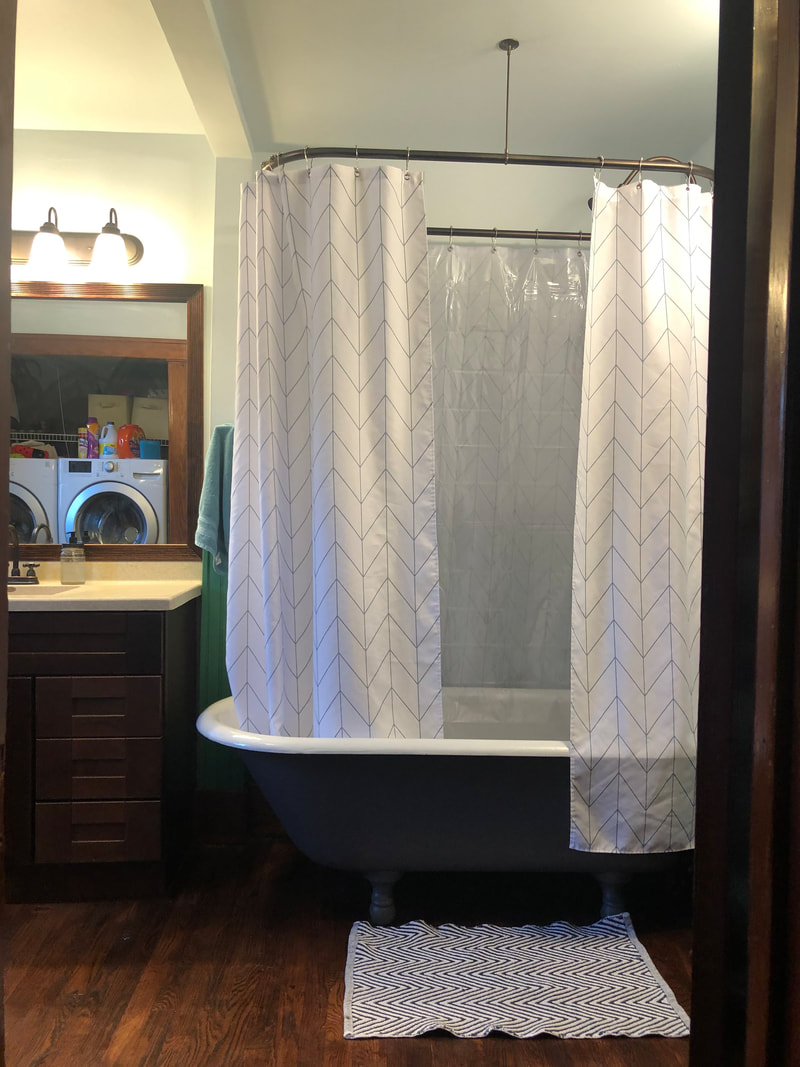 There's that beautiful clawfoot tub. The boys just love taking baths in it. 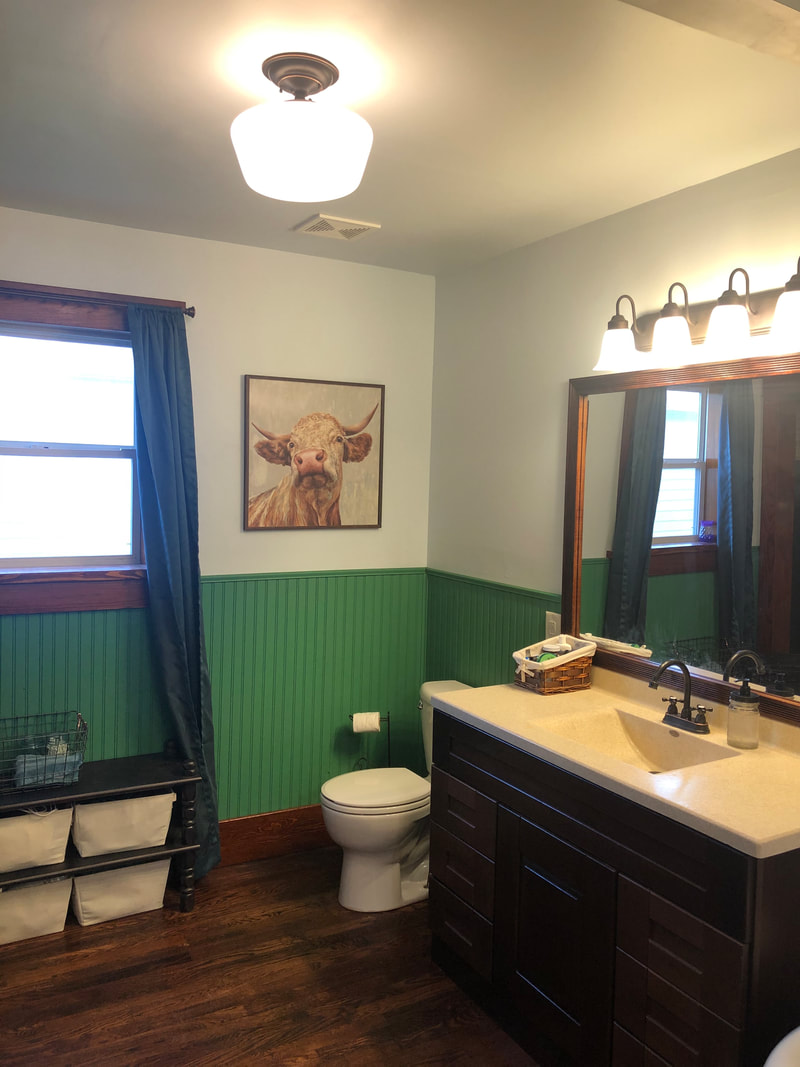 I just love my schoolhouse light fixture.
2 Comments
Grandma
11/3/2019 04:21:14 pm
Turned out beautifully. Proud of you and Tyler.
Karen.
11/4/2019 06:03:43 am
This is fantastic. High fives all around! Leave a Reply. |
Kathryn HollandWife. Mother. Teacher. Lifelong student. Archives
March 2022
Categories |

 RSS Feed
