|
Whoa. Life gets busy. I'm thankful for my long weekend from school that has allowed me to come up with some creative organizational solutions for our Little White House. My side hustle business has overtaken the main floor of our house, and I can't remember the last time we ate at the dinner table because it's overtaken with my light box for photographing listings and packaging materials. This weekend I was able to rearrange the furniture Tetris-style and squeezed a card table near our fireplace. I've got my light box set up with my computer and unlisted jewelry drawer close by. It's so nice having a designated spot; something I'm so desperately looking forward to when we (hopefully) begin adding on this spring. We visited the bank a month ago and got pre-approved for our construction loan. During that time, the banker said she'll send an appraiser to our house once we have our final estimate number in. Apparently those words sent a tizzy into my husband's head, because once we got home, he started talking about fixing up the entryway. Oh the entryway...the fairly large 8x10 room that's home to all of my inventory storage. The room that's changed more times since we've moved in than I can count. When we first moved in, it was home to a large 4x10 walk-in sliding door closet/cabinet that was covered in 70s wood paneling. Tyler fondly recalls the three behemoth window air conditioners that took up residence in that closet before we took the closet out. (And got central air conditioning.) Back in 2012 when we removed the plaster & lath from the dining room/living room, we took out the large closet and 4' wall partition. My, that had opened things up! We had gone from a clustered awkward storage area to a beautiful, open space. We vaulted the ceiling up to the 2nd floor and added a grand mission-style chandelier. 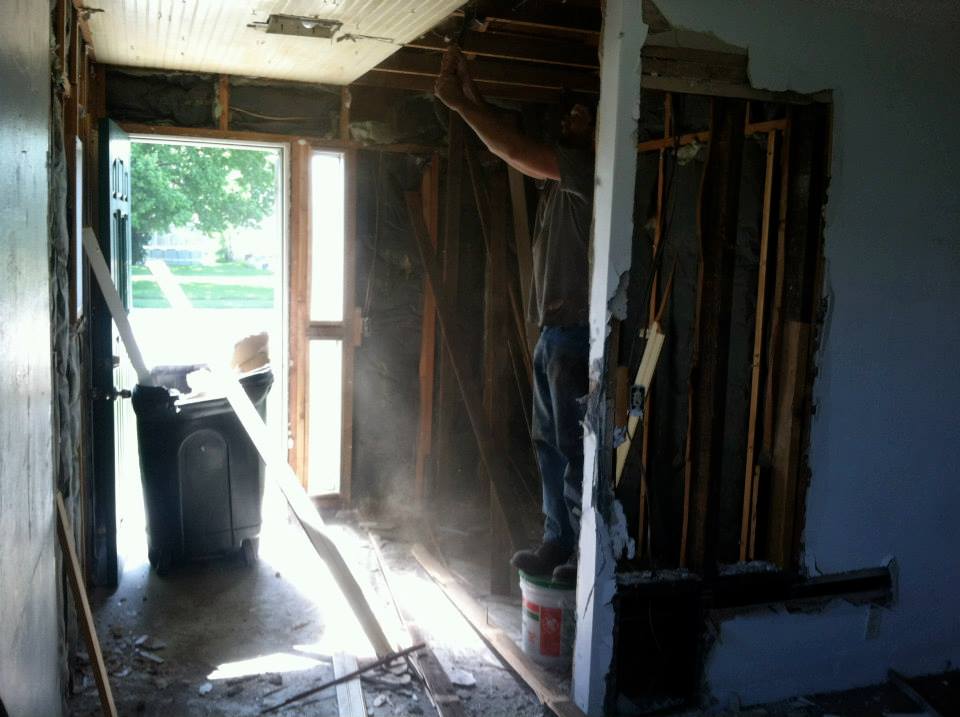 Probably the best "before" picture I have. While the 70s paneled closet is gone, you can still see the wall partition. 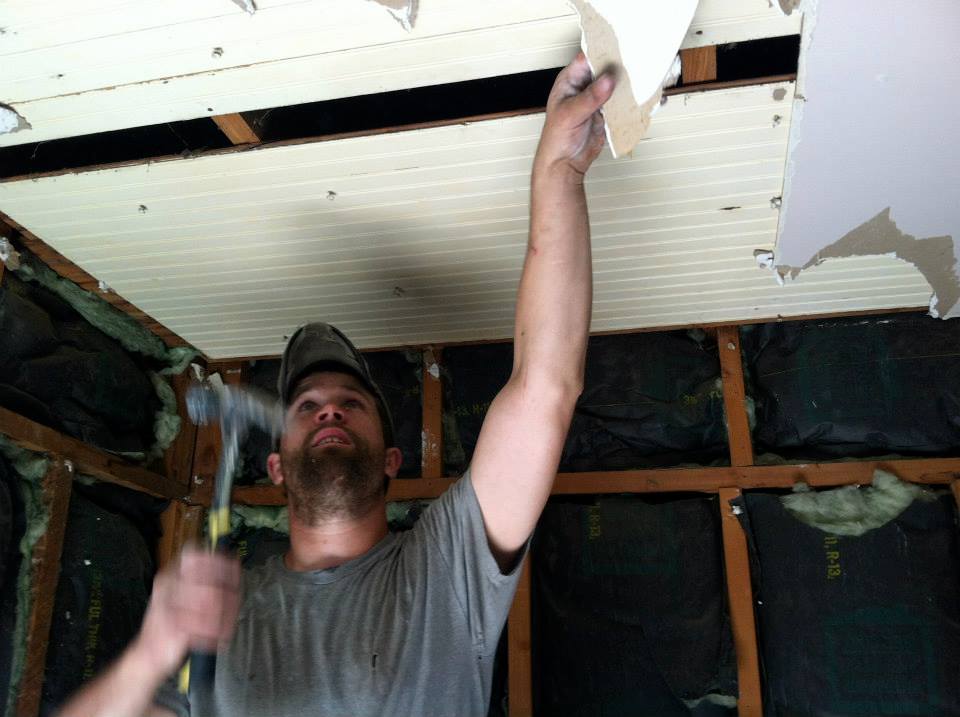 My young, spry husband working on removing the old beadboard ceiling we have since vaulted. 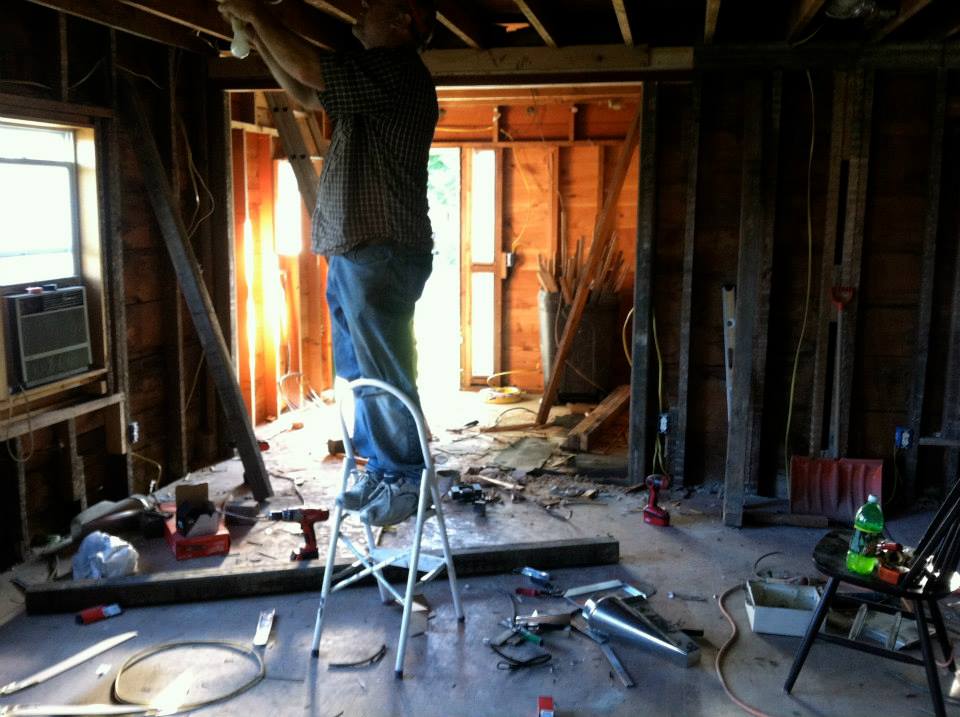 There you can see one of the behemoth air conditioners working overtime in the uninsulated shell with June heat. Unfortunately, after redoing this room, the laminate plank flooring we had put down didn't last more than 4 years, and our aging cat had taken its toll on the poor room. Our Simon cat had been with us and our house since we moved in back in 2012, but by 2019 when he was quite elderly, he had chosen to take it out on our poor entryway. After Simon passed, we tore up the laminate, and had to remove the bottom 12" of sheetrock where he had sprayed. It. Was. A. Mess. The entryway was simply just now a storage area where we hoped no guests would enter or judge. The original concrete floor was covered with an old linoleum that was in horrid condition, and I had just learned to live with no trim and sheetrock missing from the base of the room. ....But the chandelier looks nice, doesn't it? Ha... 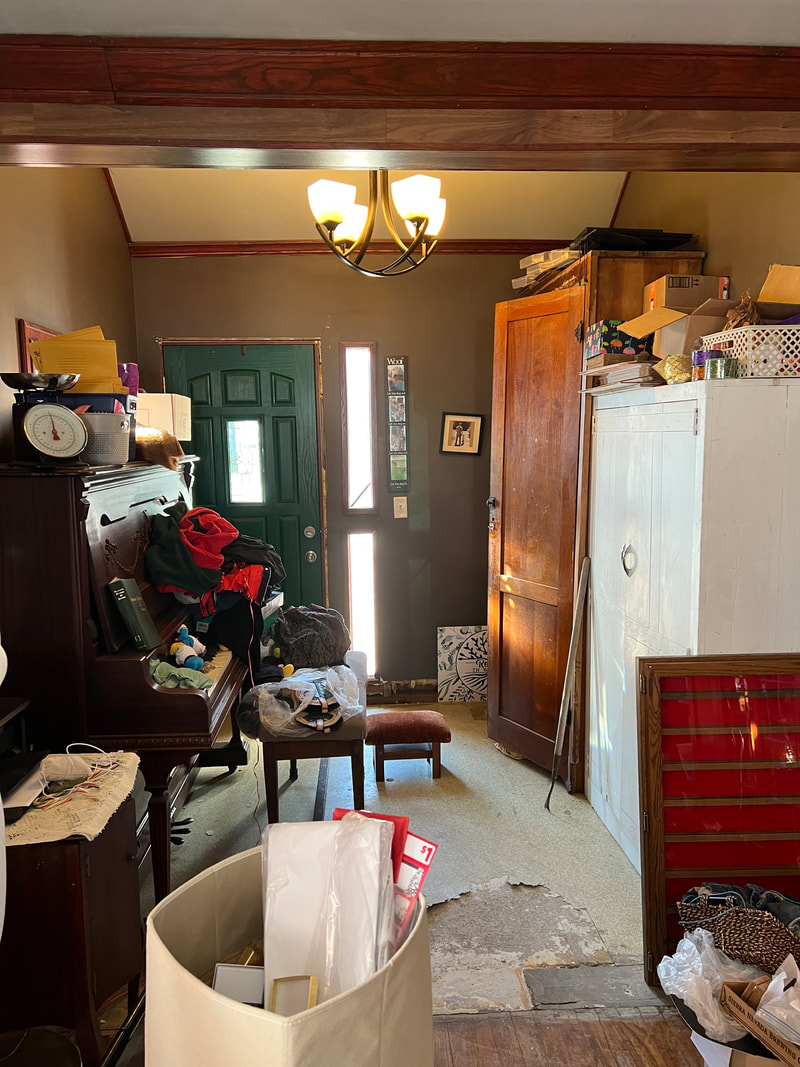 The aftermath of Simon, and lack of space for my side hustle. Isn't that missing sheetrock lovely? We had begun to rip up the linoleum to see what it'd take to remove. With Tyler's enthusiasm to fix up the entryway, we went to Menards to price tile. With our addition, we plan to take our house back to it's 1920s charm when it was built. I desperately wanted white 1" penny tile, but figured it was out of budget. To my surprise, we were able to make it work! I chose my white 1" penny tile with charcoal colored grout. However, before laying the tile, we needed to finish pulling up the linoleum and fixing the drywall. Tyler pulled up the linoleum while I was at school one day, and I began patching the drywall as soon as I got home from school. We spent the next week finishing drywall and painting. I found a beautiful dusty blue Valspar paint at Builders. Laying and installing the tile was a breeze. Tyler asked his brother, Trent, to come in and lay it down as we weren't sure how it'd go. After the mortar had cured, it was time for grout. Tyler and I weren't too sure about grouting it ourselves, but after some over-the-phone encouragement from Trent, we decided to give it a go. We were surprised at how easy it was! 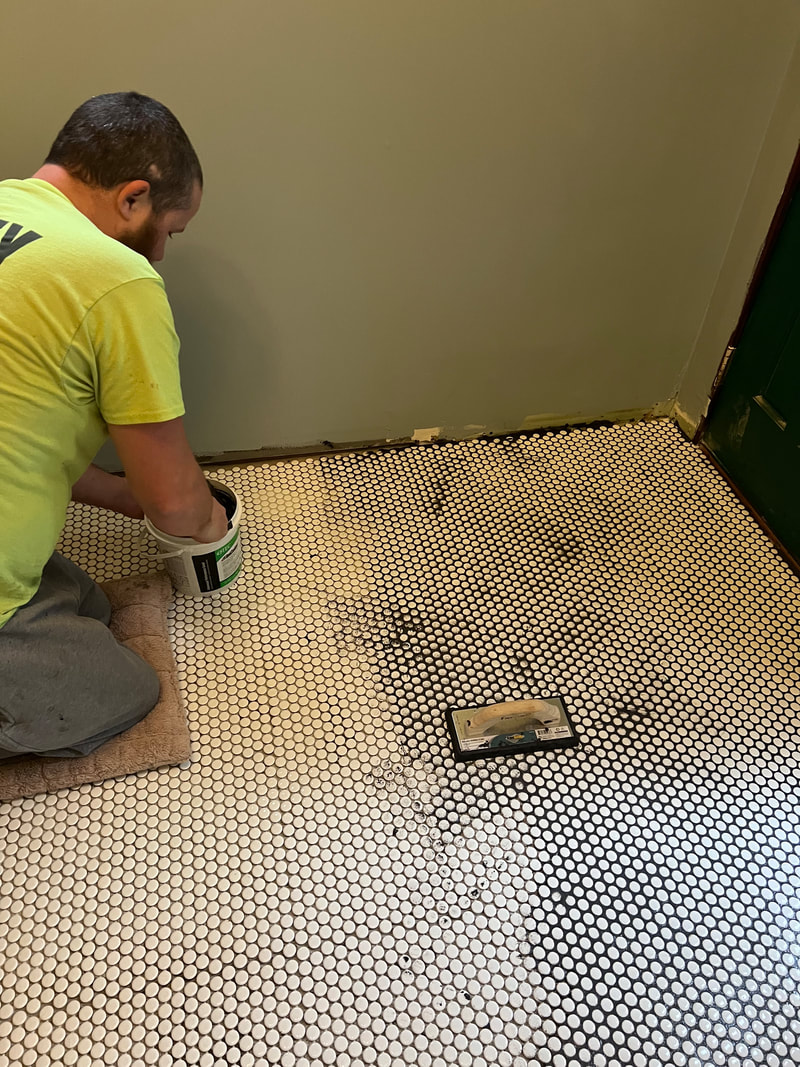 Tyler grouting the 1' penny tile. 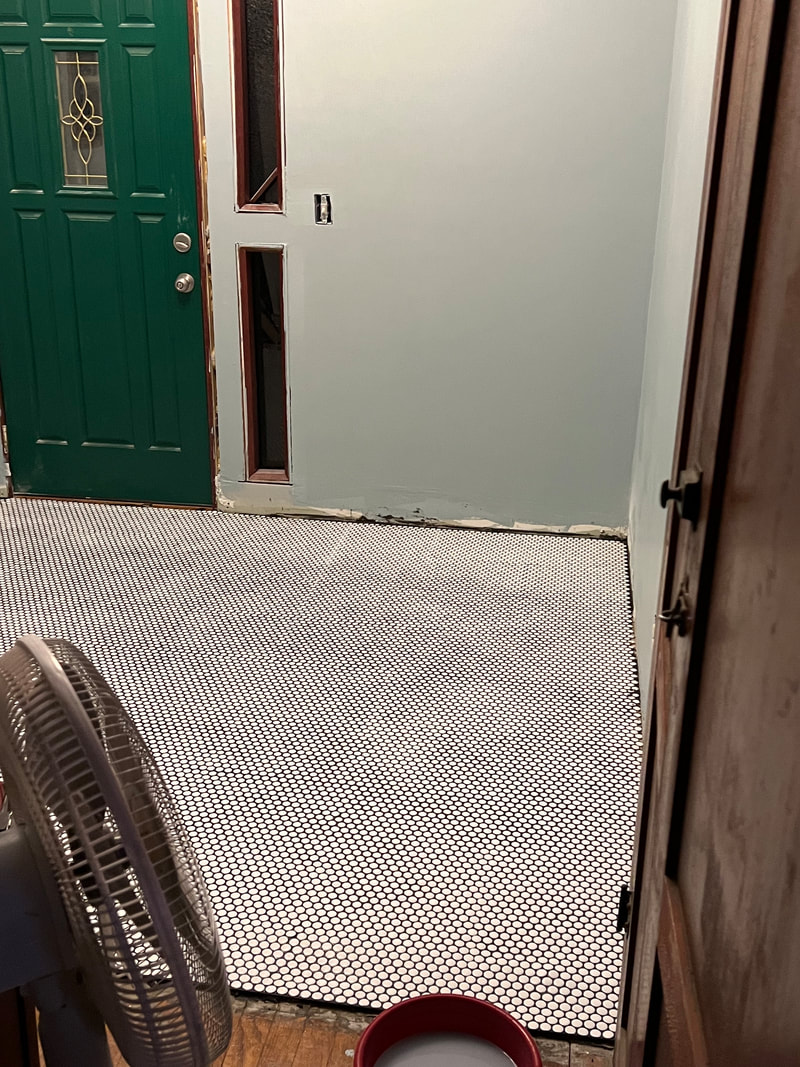 Grouted and ready to dry. Once we had the nice floor installed, something just didn't look right. The door. When we moved in back in 2012, I just loved the green and white color scheme of the house. However...this green door just wasn't looking right anymore and didn't match the design I had laid out in my head. Of course this green door wasn't original - and it probably wasn't the 2nd door of the house either. Through one of my jewelry buying adventures, I got to talking to a lady at an estate sale, and realized that we live in her uncle's old house. Through our conversation I learned that our original door to the house met its fate several years ago in a shotgun accident. The men had just gotten home from bird hunting, and the shotgun was still loaded in the house. The glass panels of the original door met the buckshot, and the rest is history. I had always wondered what that original door had looked like. With craftsman - mission style as my inspiration, I set out to find a door that would do justice to the house. I located my dream door on the Menards website, and had it custom designed. The original side lites had been knocked out in the past and didn't match, and trimming them would be such a pain. I decided to go with a beautiful stained glass door with matching side lites in a dark oak color.  The computer rendered design of our custom door. I custom ordered our door on a Saturday evening, and by Thursday of that next week we went to pick it up. When I ordered the door we were in the midst of a below-zero cold snap! I was trying to conjure up a creative solution to installing a new door in freezing conditions. Deer stand heater and thick poly tarps, anyone?? Fortunately for me, the forecast for that upcoming weekend promised t-shirt weather. Tyler called his dad, our go-to expert handyman, and he was free. My plan was falling into place! That Saturday, we installed the door. 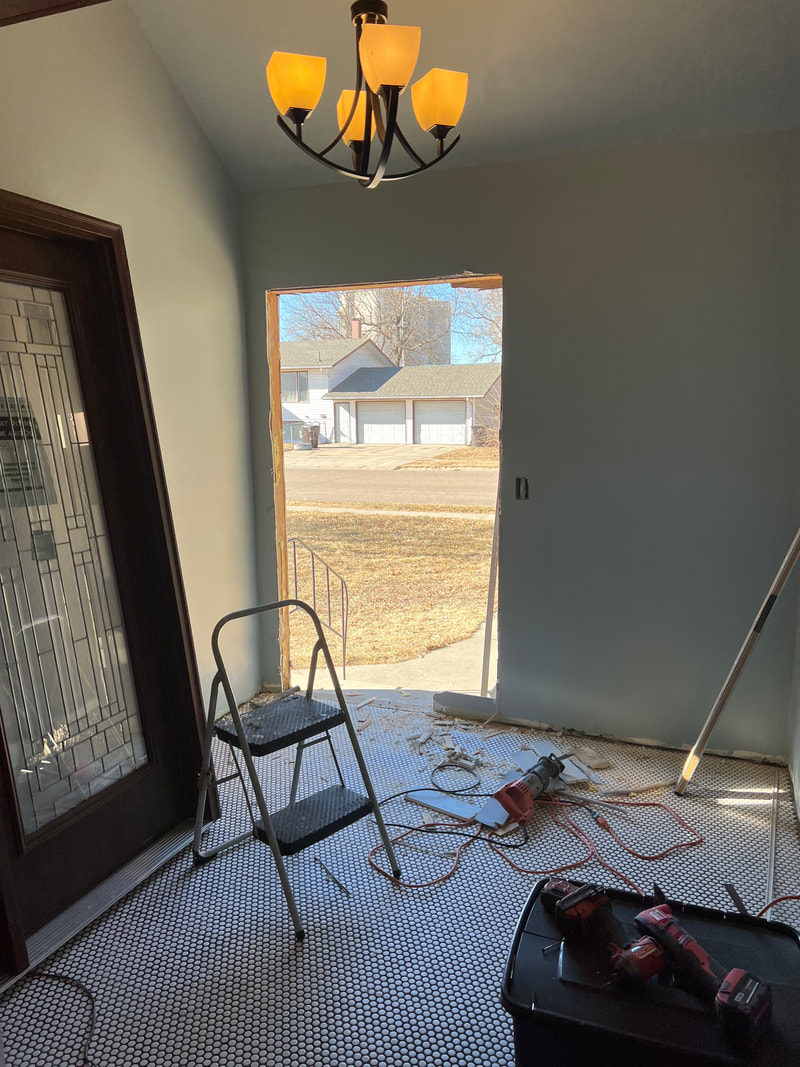 The old frame & side lites removed, and a rough opening ready to go. Thank goodness for that warm weather. 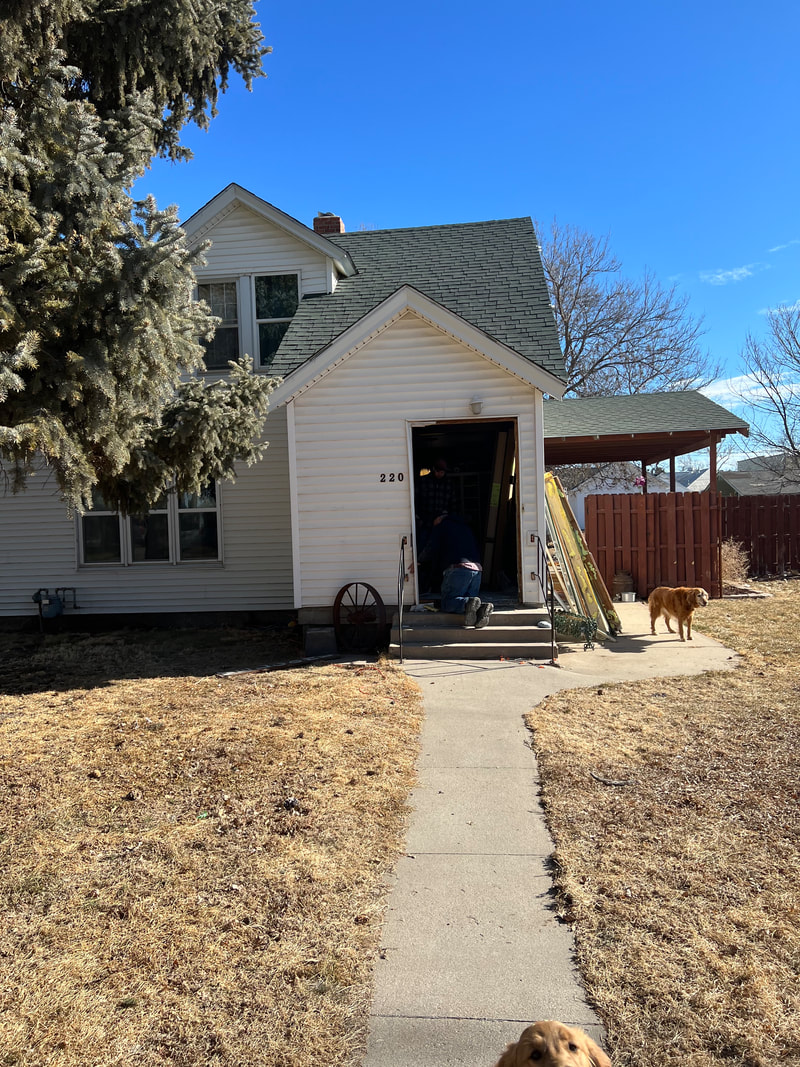 It's always a bit terrifying to look at the outside of your home with a large hole through the side. Shelby and Duke dog were there to make everything better with their photobombs though. 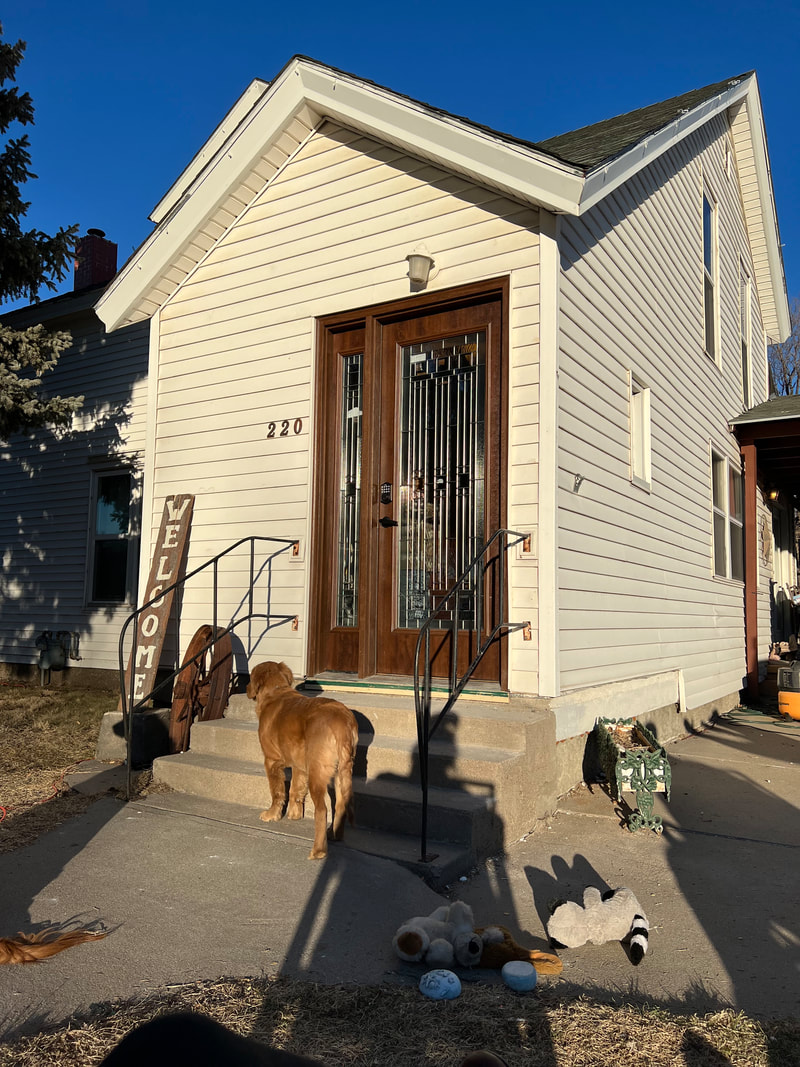 The outside finished view. 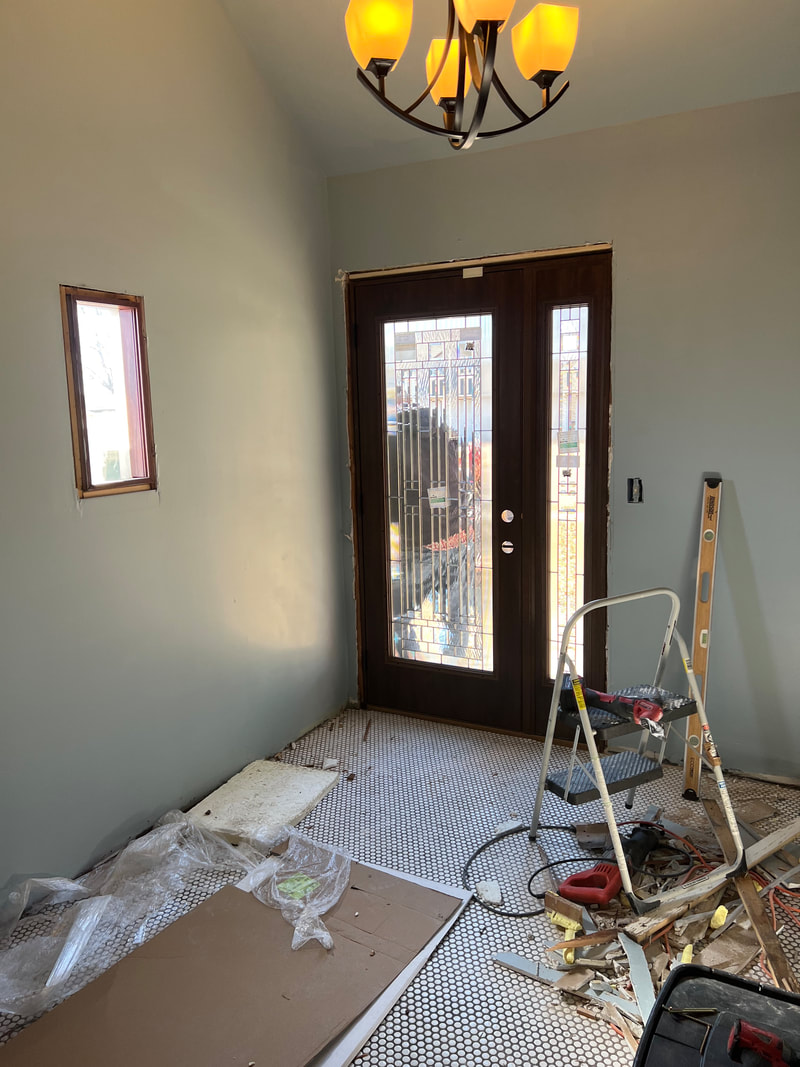 The inside "finished" view of that day - complete with Sawzall construction mess. With the door installed, it was time to trim and finish up. It was then that I had noticed my second gallon of paint was just the tiniest fraction of a shade darker, and I ended up having to repaint everything all over again so it would match. Fun. With the painting mishap fixed, we took to the garage to sort through our assortment of salvaged yellow pine trim. This trim matches the original trim we have upstairs, and I couldn't wait to get it all put together. I just absolutely love putting charm back into our little house. Tyler and I measured the boards together, he cut, and then it was my job to give each piece of trim a "touch - up" treatment. 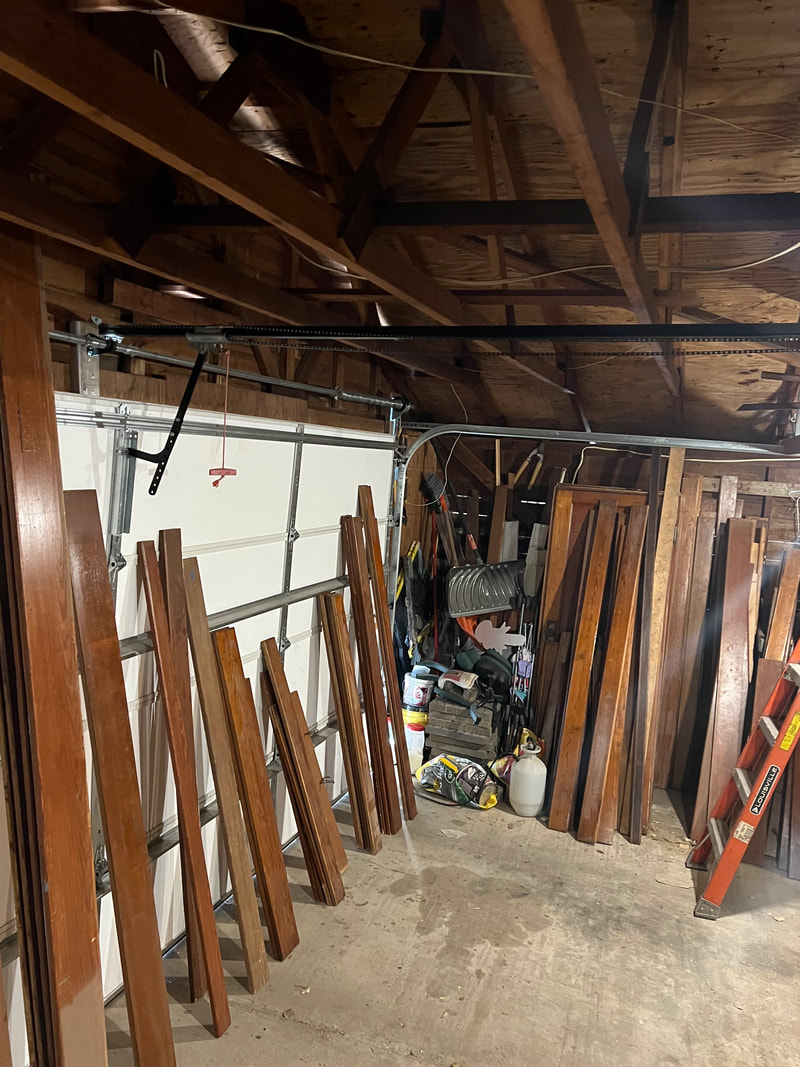 Sorting through the 100+ year old salvaged yellow pine trim. 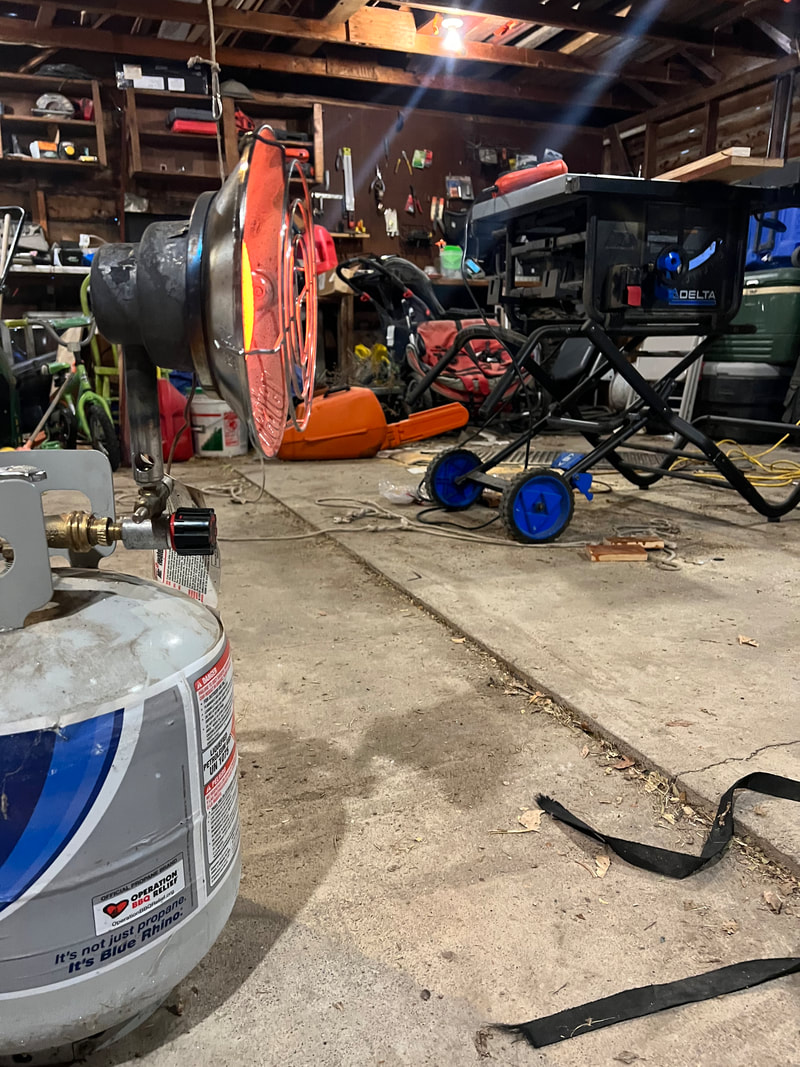 A single simple propane heater heated the garage the chilly day when we cut all of our boards to match. 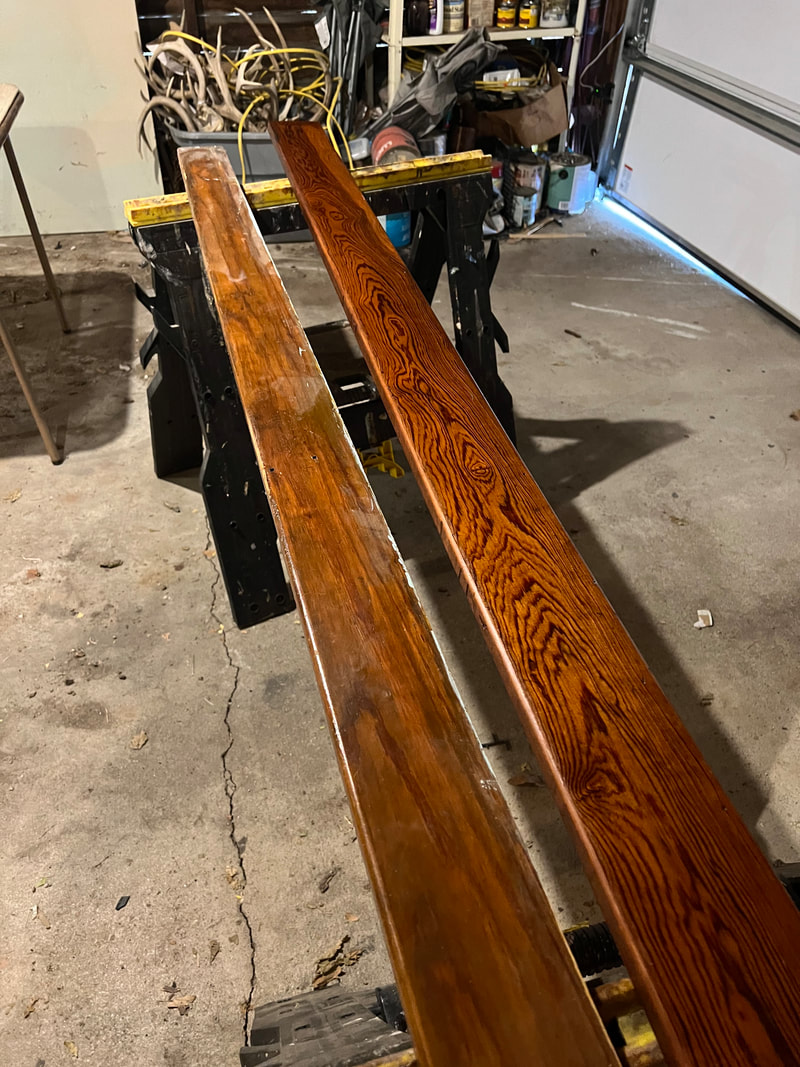 Before and after of the yellow pine boards after their "touch - up" treatment. 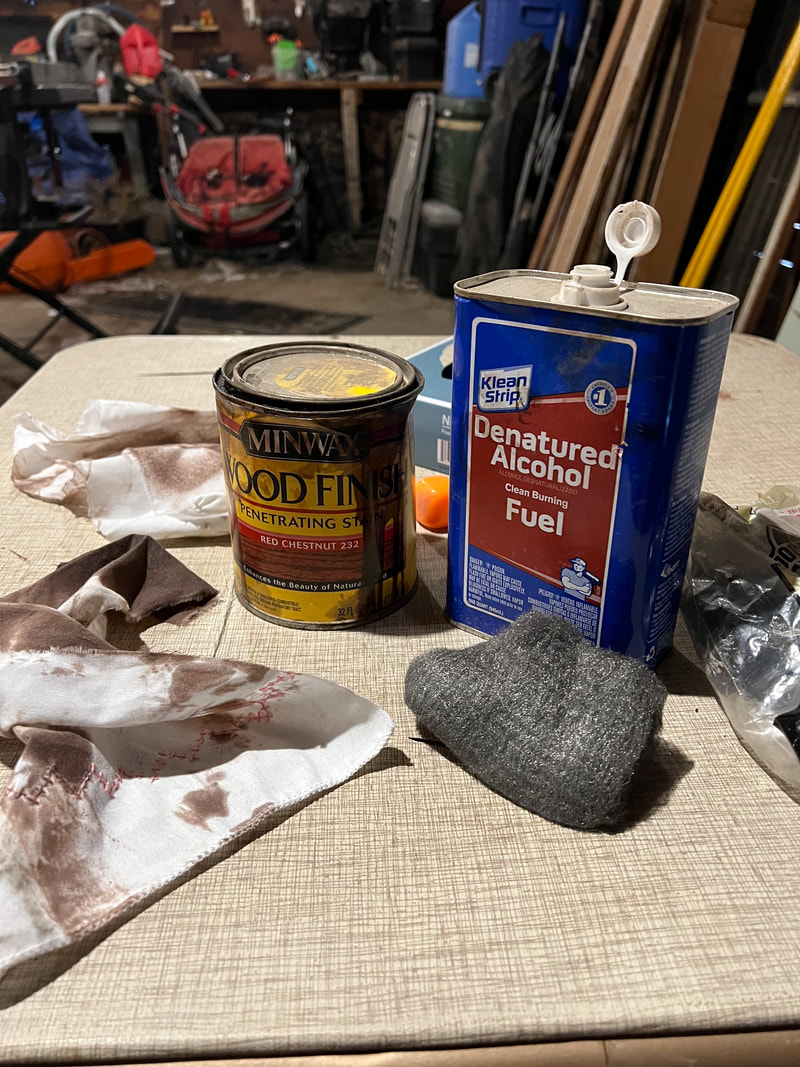 The "touch - up" treatment: denatured alcohol to remove alligator cracked shellac, stain to fill the cracks/scratches, and then two coats of amber colored shellac over the top. 100 years ago, polyurethane wasn't a thing. Wood was finished with shellac, a type of resin created from a beetle. Yes, an insect. Amber shellac gives wood that beautiful, rich finish that you can't replicate today. The neat thing about shellac (besides the fact that you can still purchase it at your local hardware store) is that the finish is fully repairable. With a bit of denatured alcohol and steel wool, you can dissolve the shellac enough to make it pliable and remove an alligatored cracked finish. Then, adding on a couple new coats of shellac makes it blend in perfectly and nobody will ever know. Neat, right? 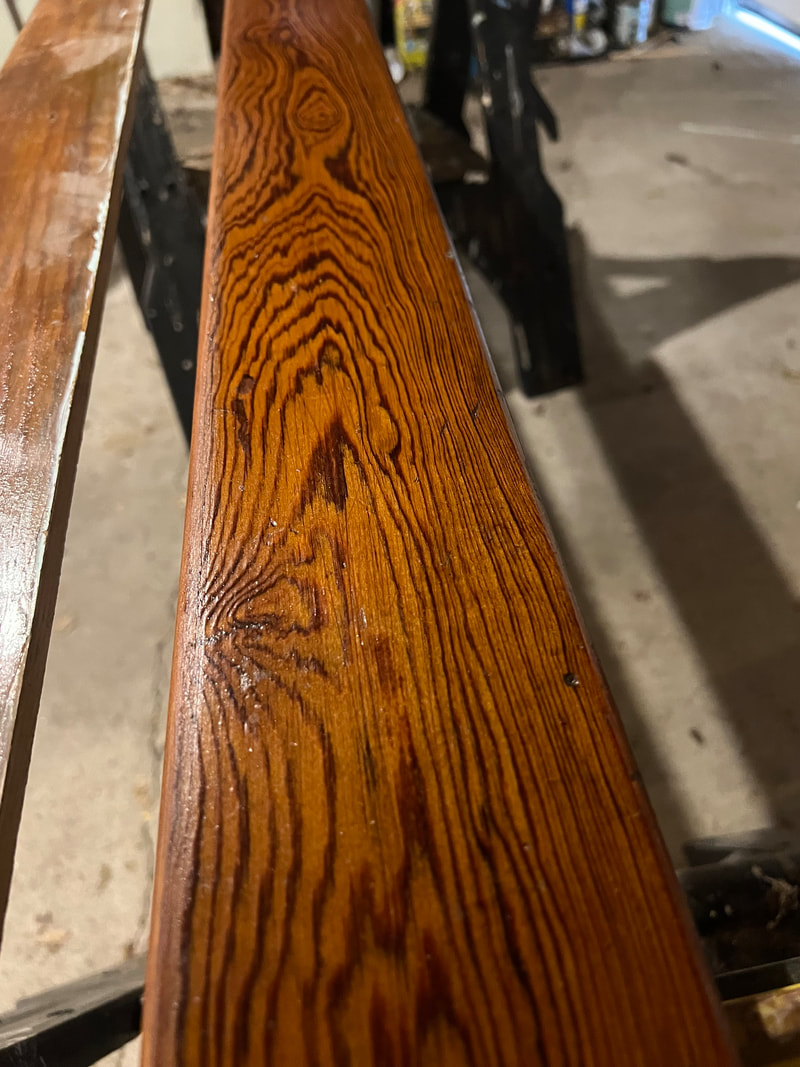 A close-up photo of that beautiful yellow pine. 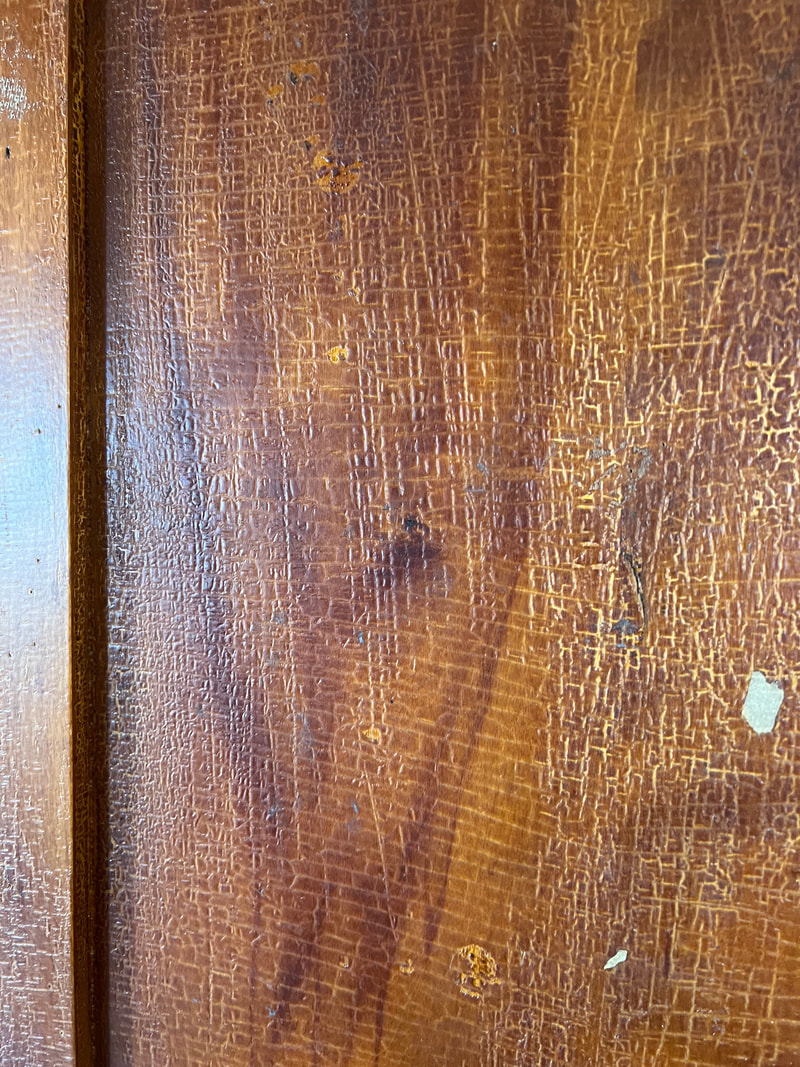 An example of the alligatored cracked shellac on my built-in cupboard for the future bathroom. That one might take a bit more elbow grease. I can't wait to see how it turns out. After pictures.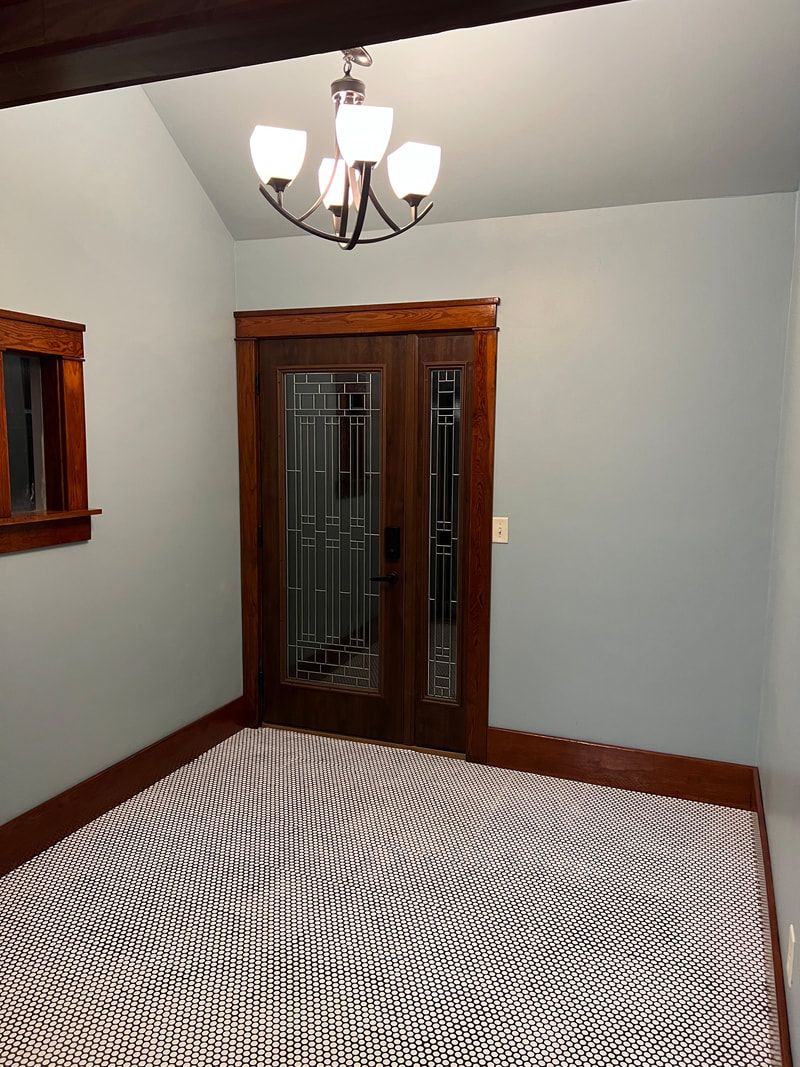 The craftsman style yellow pine trim all installed. 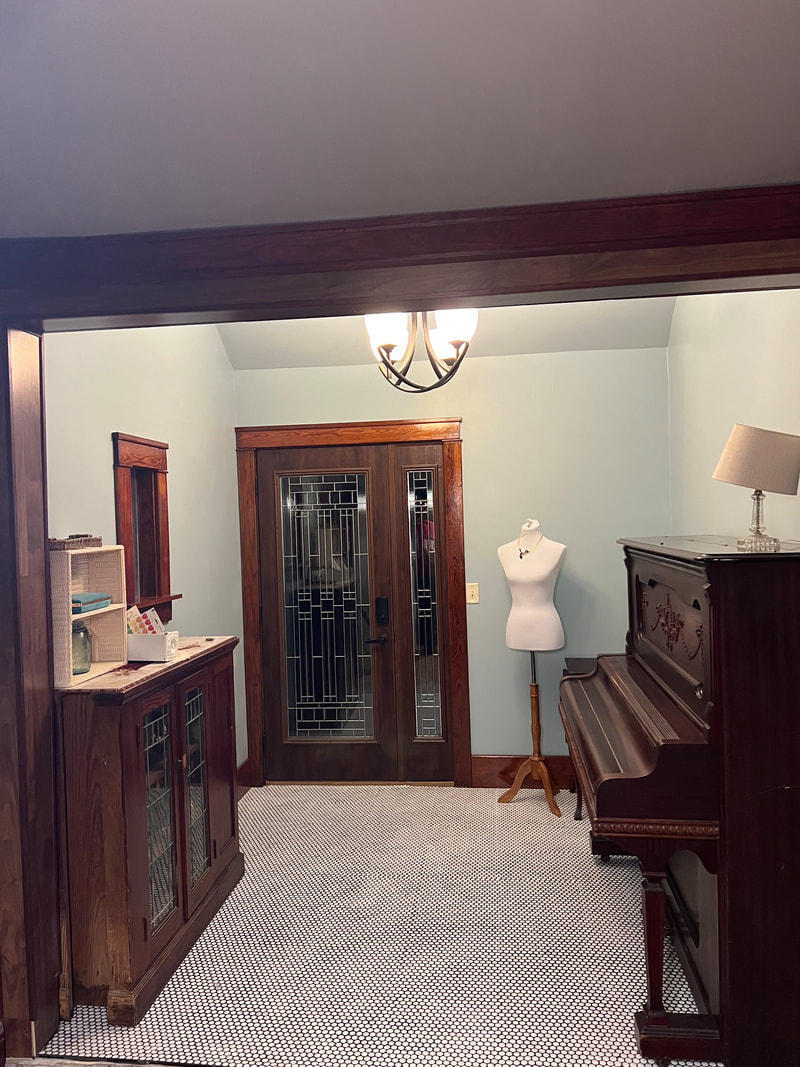 The storage cabinets have since found their place in our living room. The piano and craftsman built-in colonnade have taken their place. 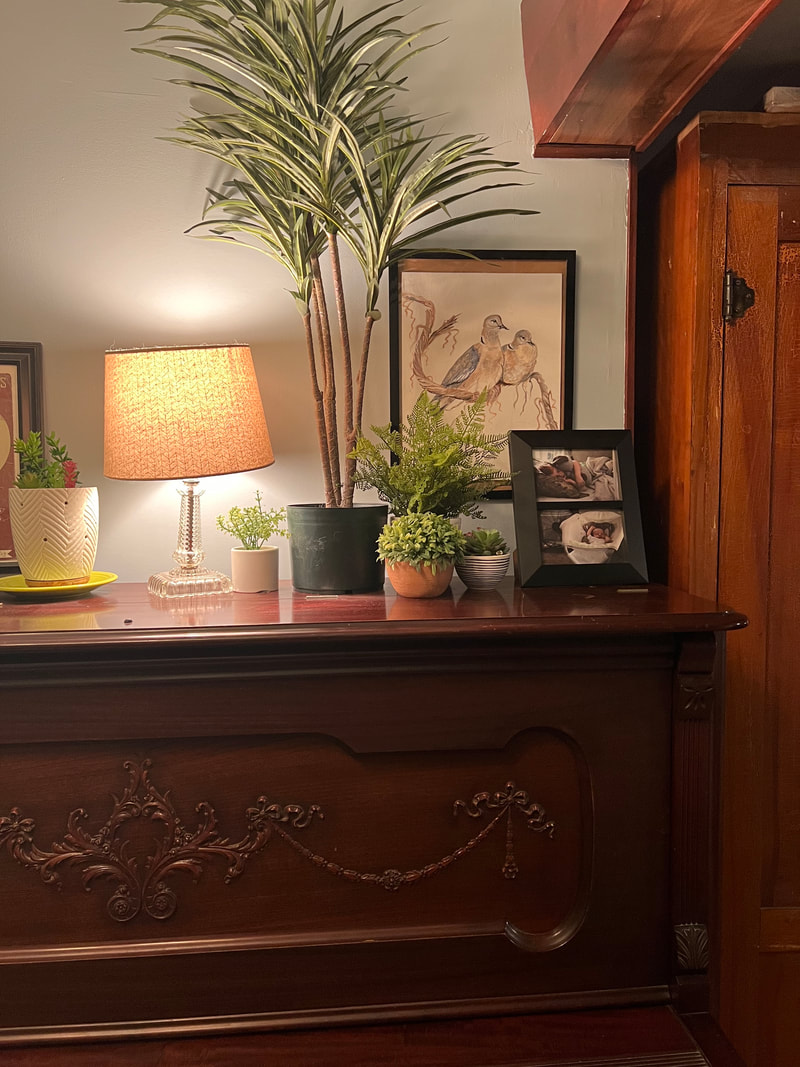 A calm and serene space. Sometimes I like to retreat to the room and dream about the rest of the house being finished and done up as well as this one. The Eurasian Collared Doves? A hand-painted piece I found on Ebay. That's another blog post in itself. This year marks 10 years that we've lived in the Little White House. Here's to you, old girl. We're getting you all fixed up, one room at a time.
0 Comments
Leave a Reply. |
Kathryn HollandWife. Mother. Teacher. Lifelong student. Archives
March 2022
Categories |
 RSS Feed
